Use the Airtable Plugin to sync new form results to an Airtable database. Airtable is a versatile system that can be useful for project management, backing up form results, CRM, inventory management, event planning and much more.
✅ Pro Tip: The Airtable Plugin requires you to predefine the column headings in your Base’s Table, to then link with relevant form fields.
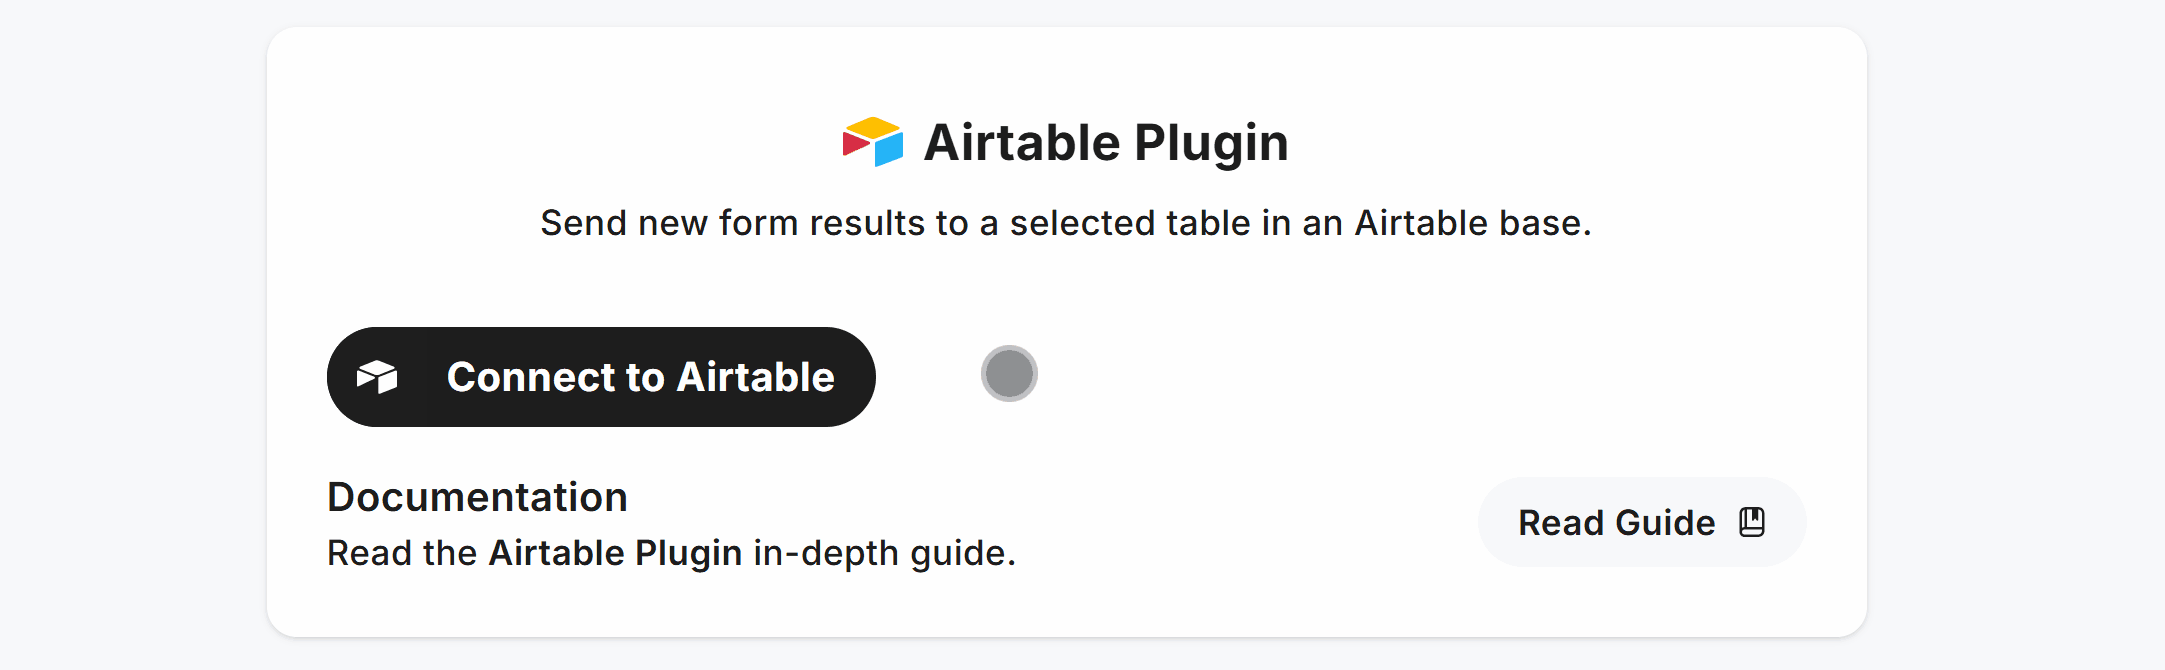
Setup the Plugin
Navigate to the Plugins tab on your selected form, choose “Airtable” then click the Connect to Airtable button to launch the authorization popup:
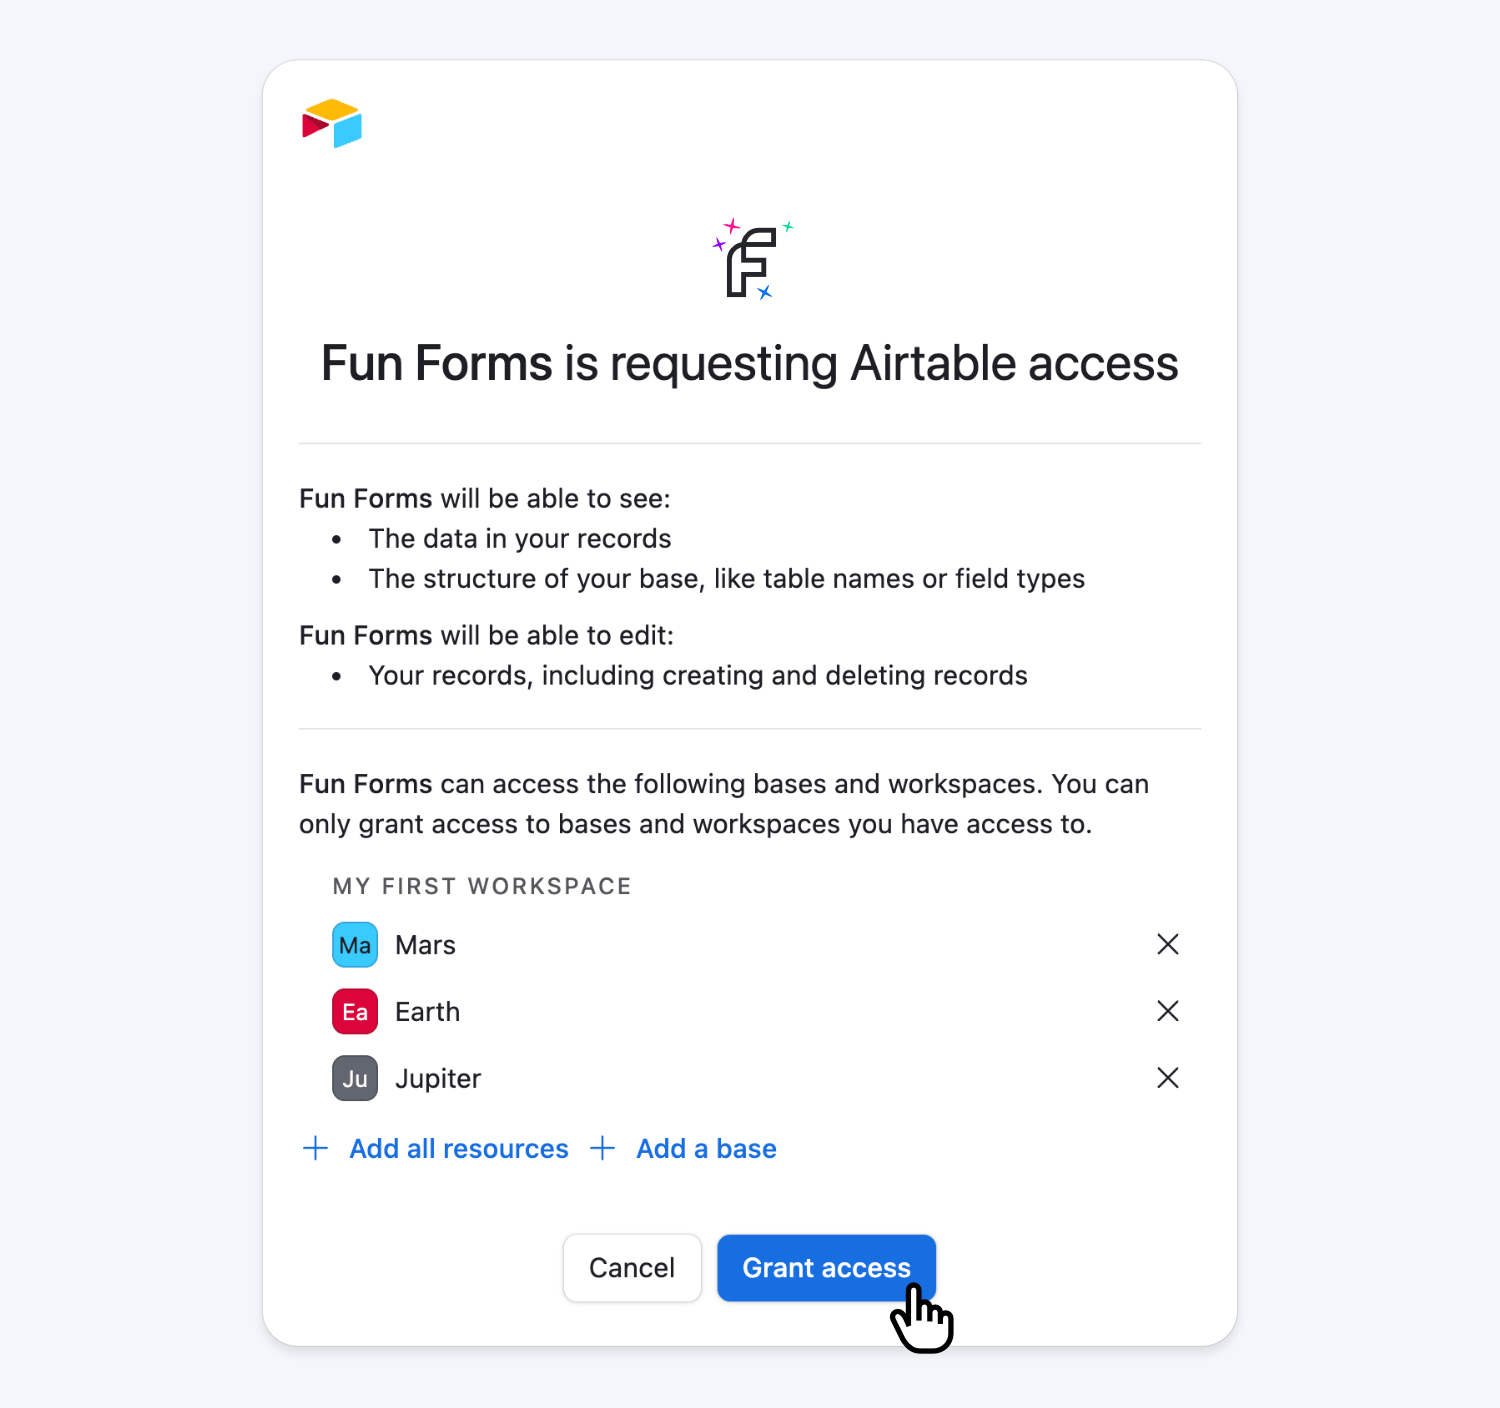
This opens an authorization window where you can sign in, then choose which Airtable Base(s) to grant access to:
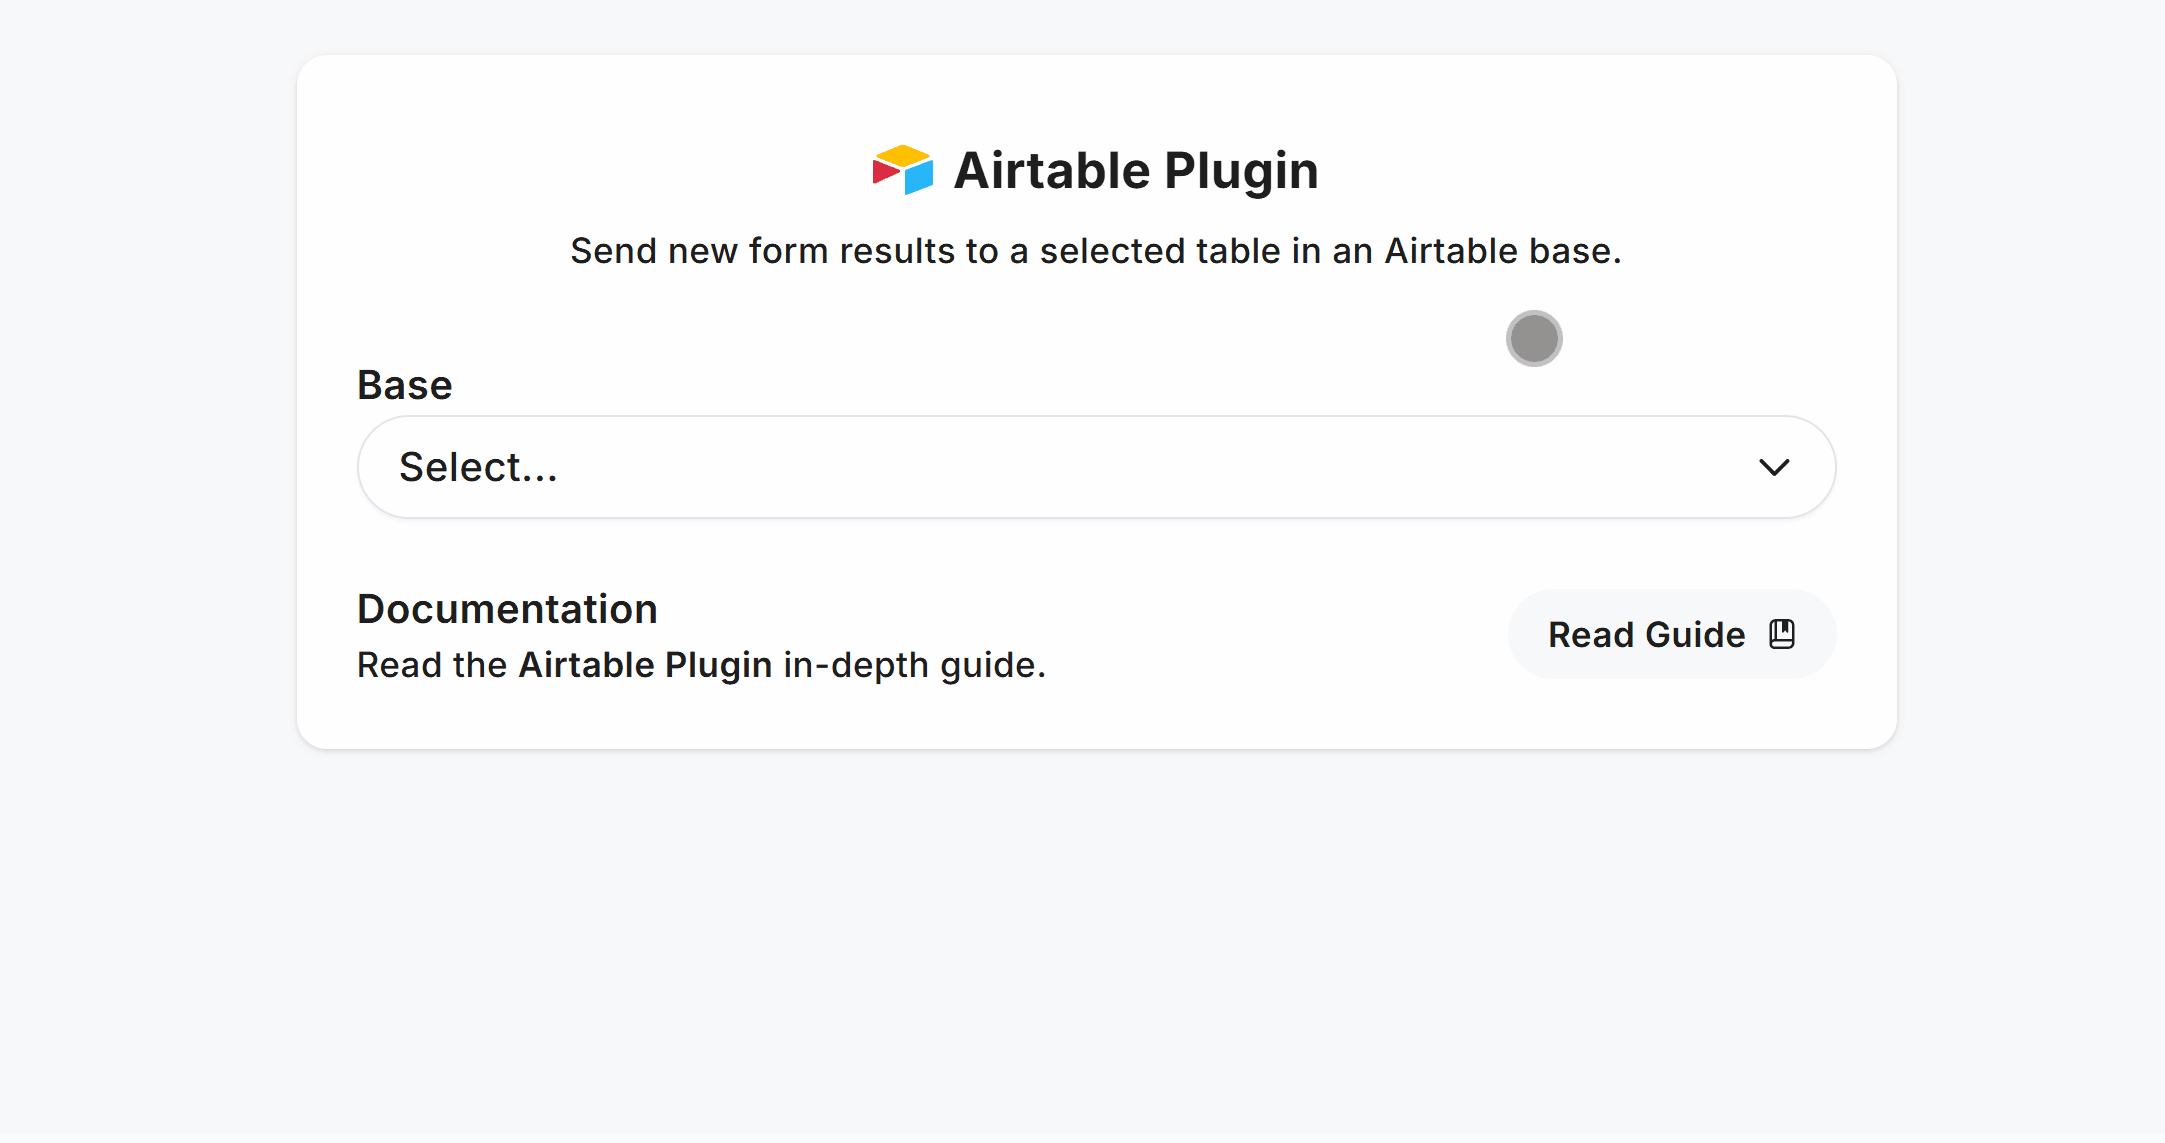
Once Airtable is authorized, we’ll display each Base you granted access to.
Select which Base and Table to create new rows in from form results, click “Save”, and you’re good to go:
Once setup, you’ll see a direct link to your chosen Airtable Base and Table for one-click access.
Connect Form Fields to Airtable
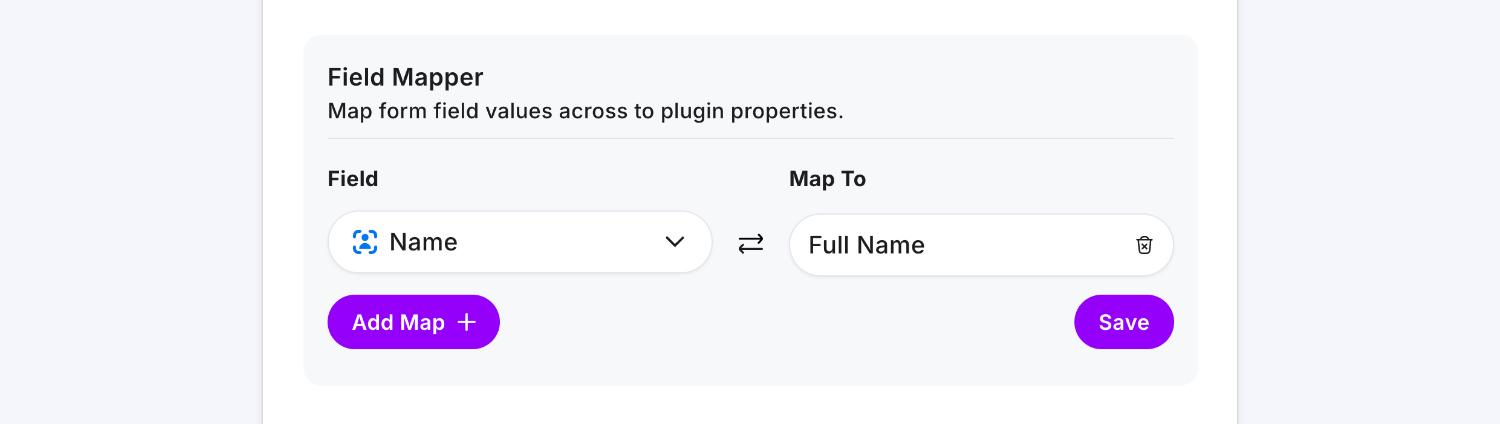
Easily connect form fields to Airtable columns using the Airtable Plugin Field Mapper to match Airtable column names.
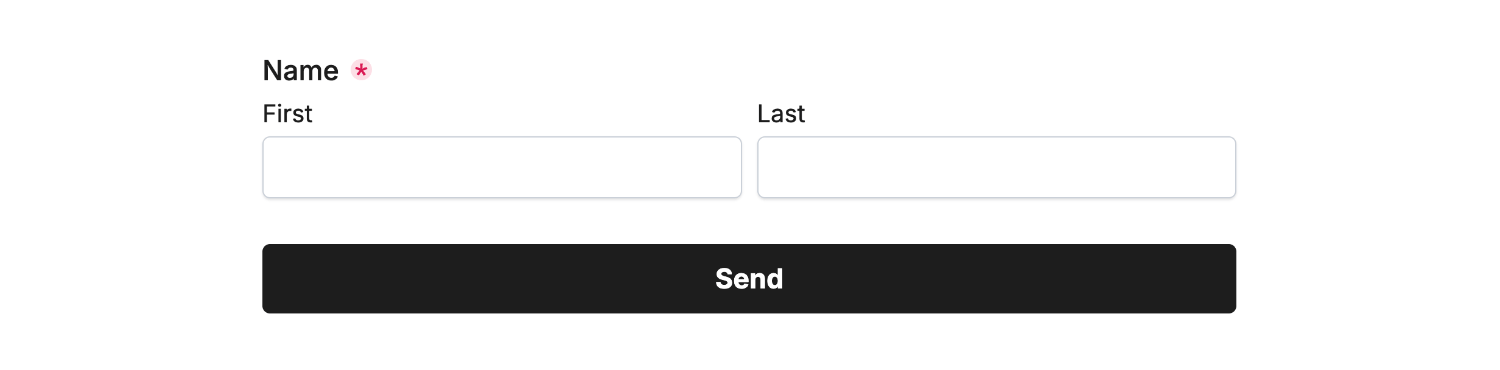
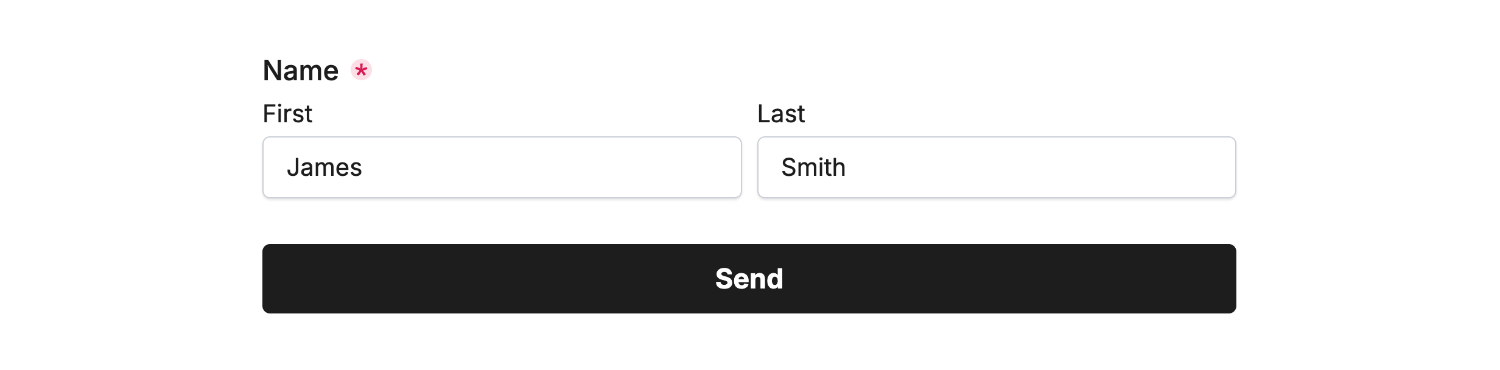
Take an example form with a Name field:
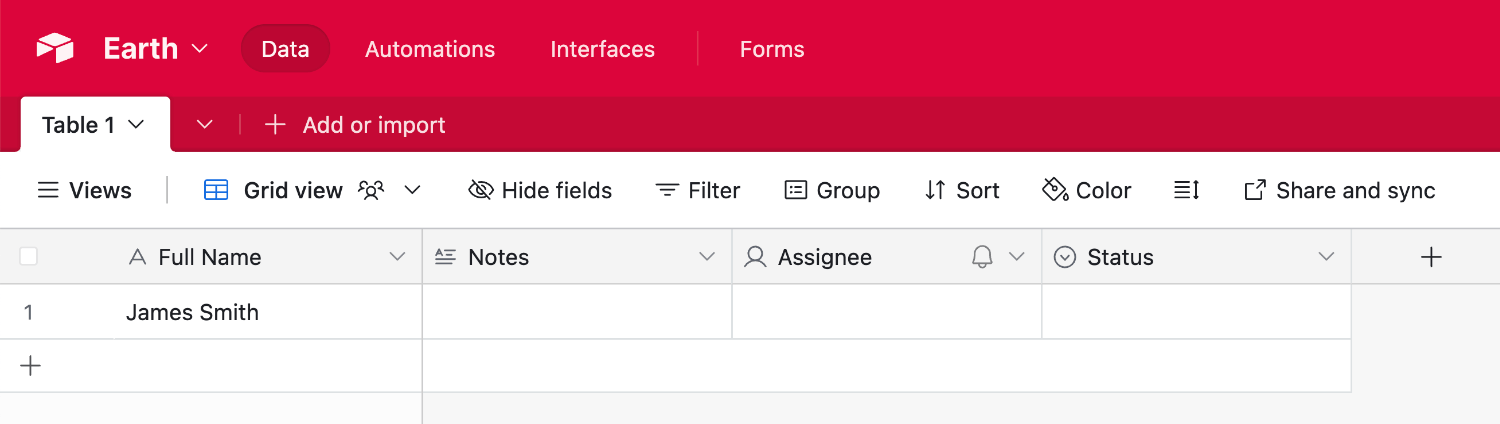
We can then name the Airtable column Full Name:
To connect the Airtable First Name column with the Name form field, use the Field Mapper within the Airtable Plugin to map the Name field to the Airtable Full Name column:
Click Save and Publish, then enter some data in your form and click Send:
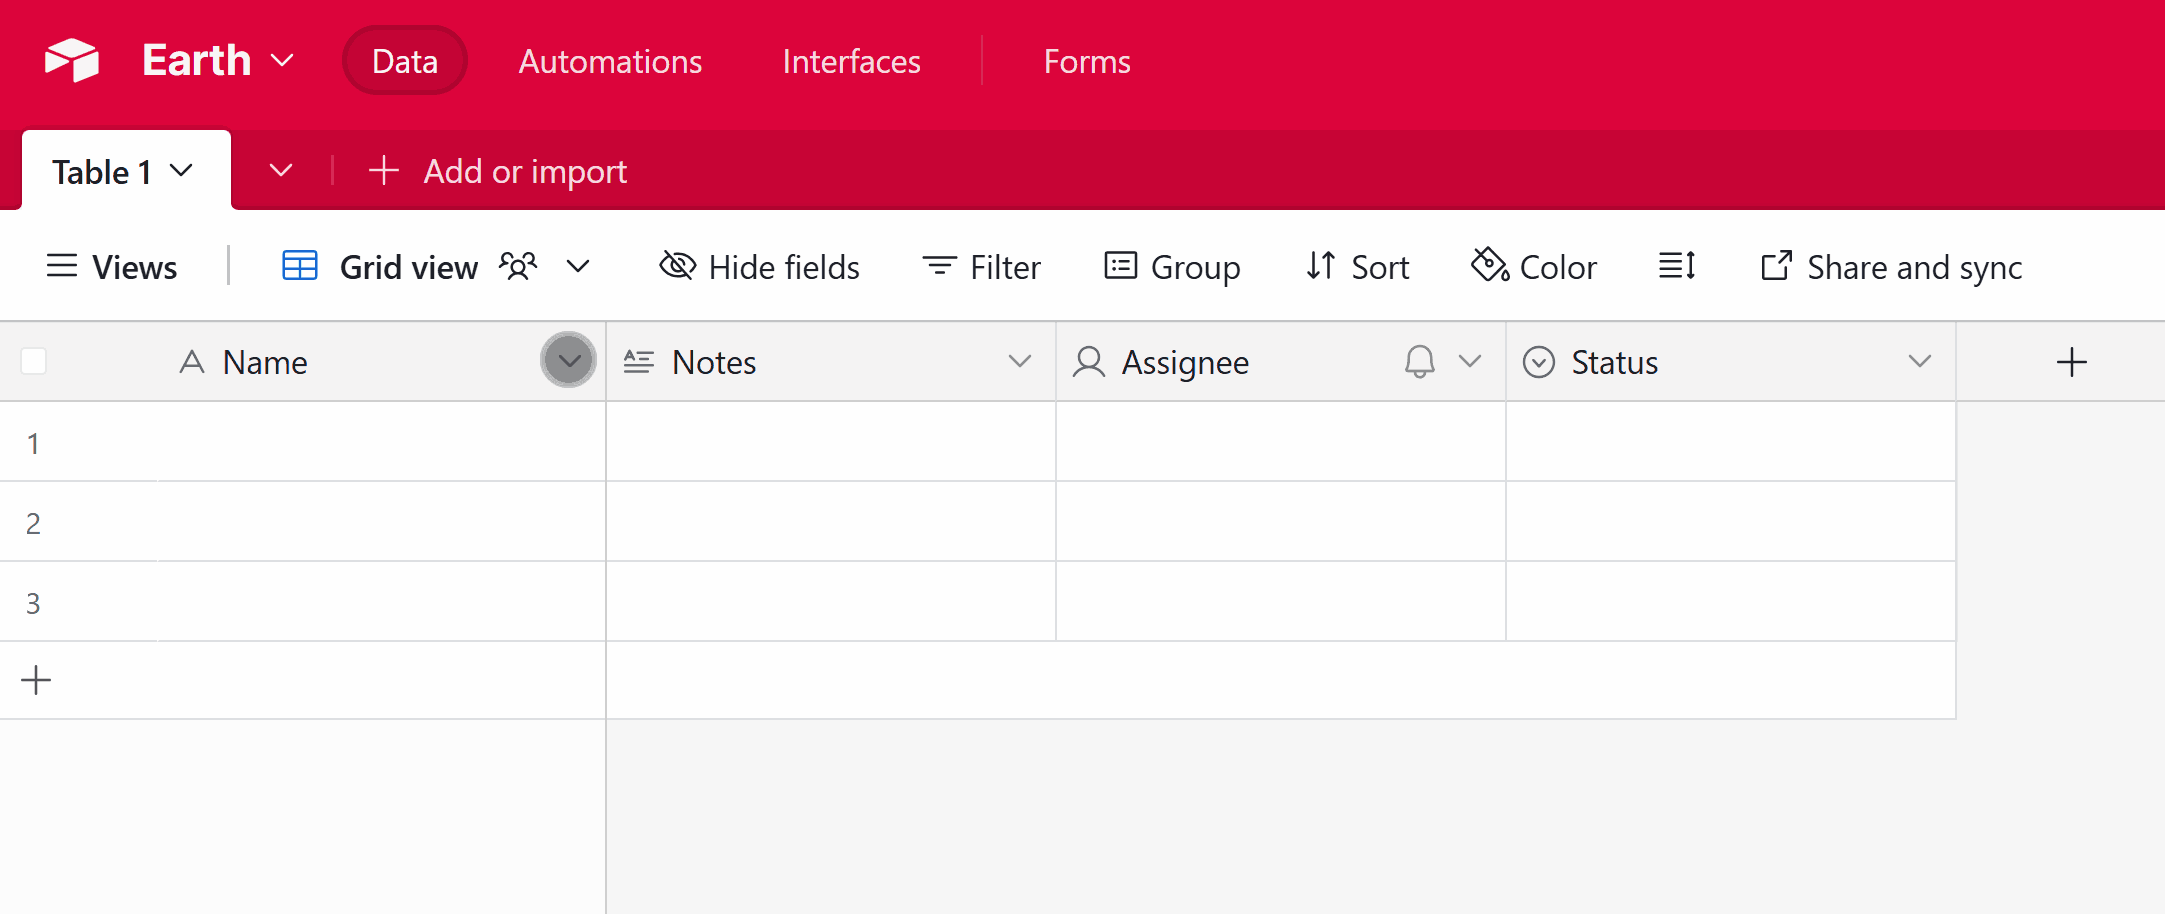
You’ll then see the Airtable column populated with the data:
That’s the two-step process to connect an Airtable column to a form field, keep exploring below for a comprehensive guide.
Supported Fields
Here are the fields and examples of each field that are fully supported by the Airtable Plugin.
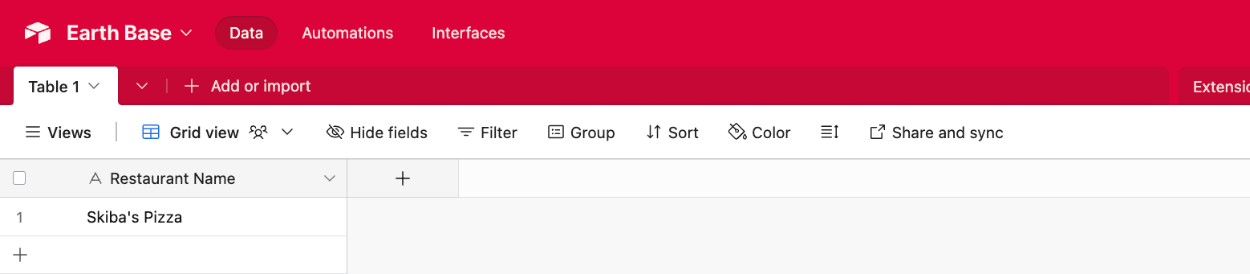
Single line text
Choose the Single line text field type in Airtable to sync plain text data that is ‘short’.

Then enter some data in the linked field and submit the form:
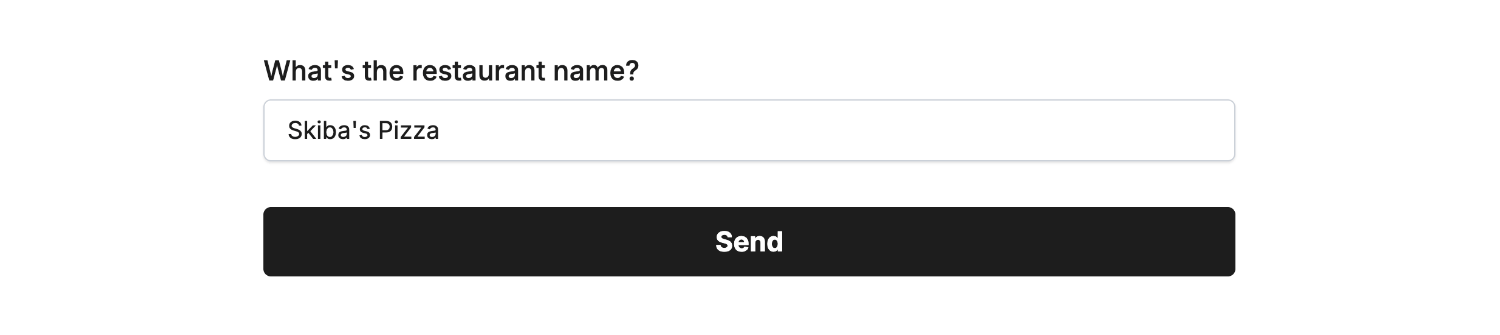 Field type ‘Short Answer’ • Field Mapped to ‘Restaurant Name’
Then view the new data within Airtable to confirm the connection:
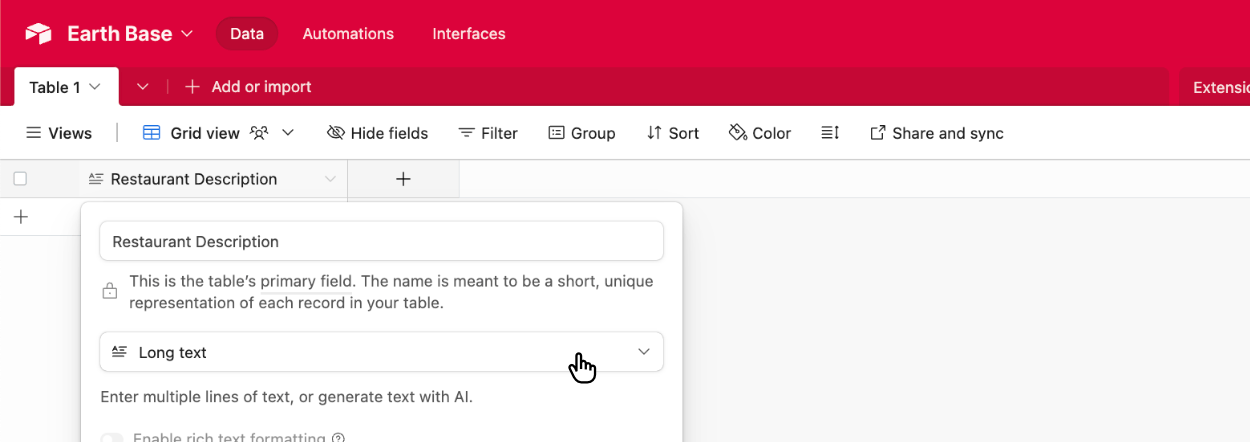
Long text
Choose the Long text field type in Airtable to sync text data that is ’long’, such as a paragraph:
Then enter some data in the linked field and submit the form:
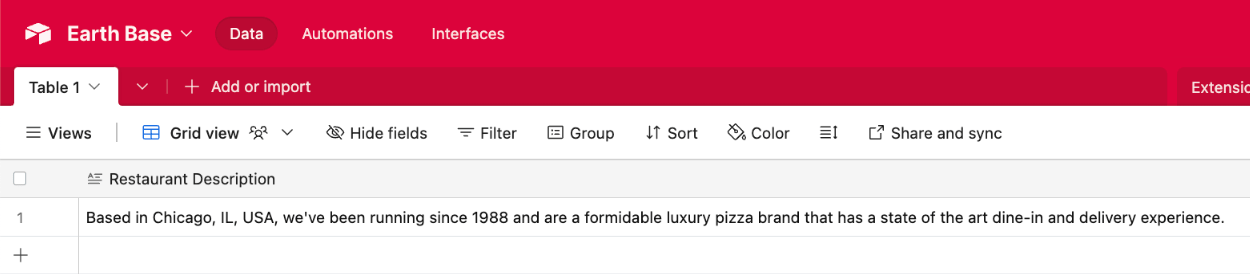
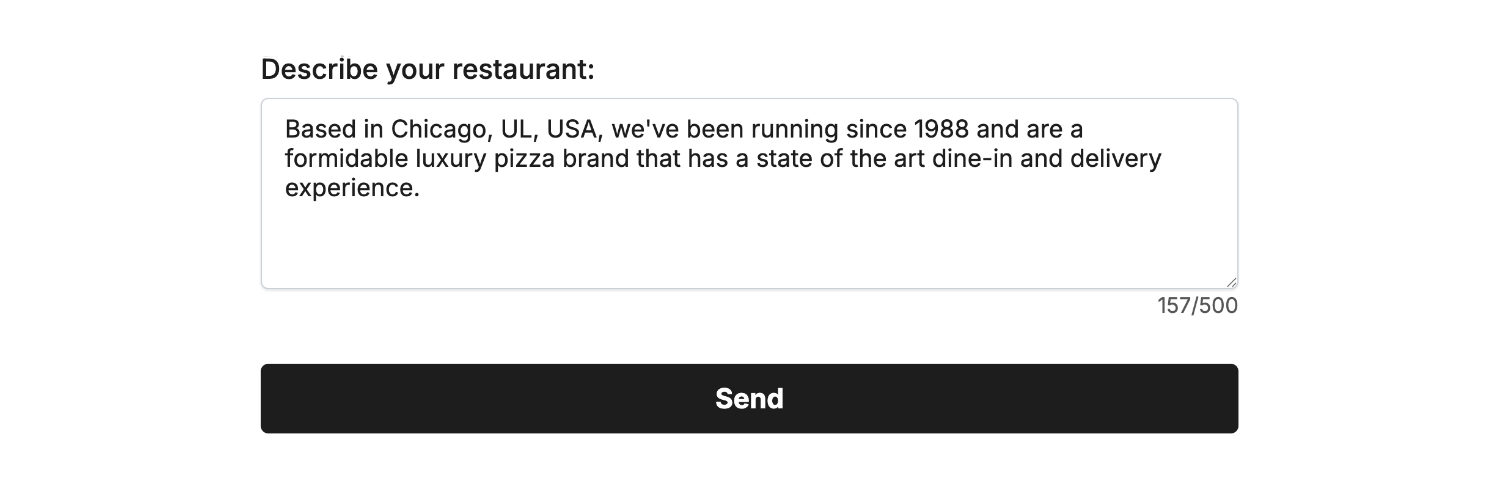 Field type ‘Long Text’ • Field Mapped to ‘Restaurant Description’
Then view the new data within Airtable to confirm the connection:
Date
Choose the Date field type in Airtable to sync calendar dates:
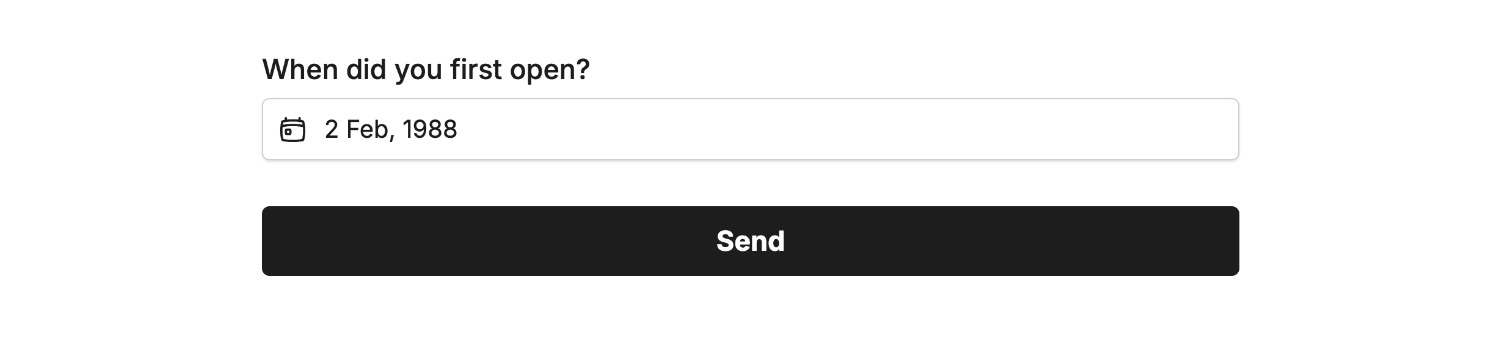
Then enter some data in the linked field and submit the form:
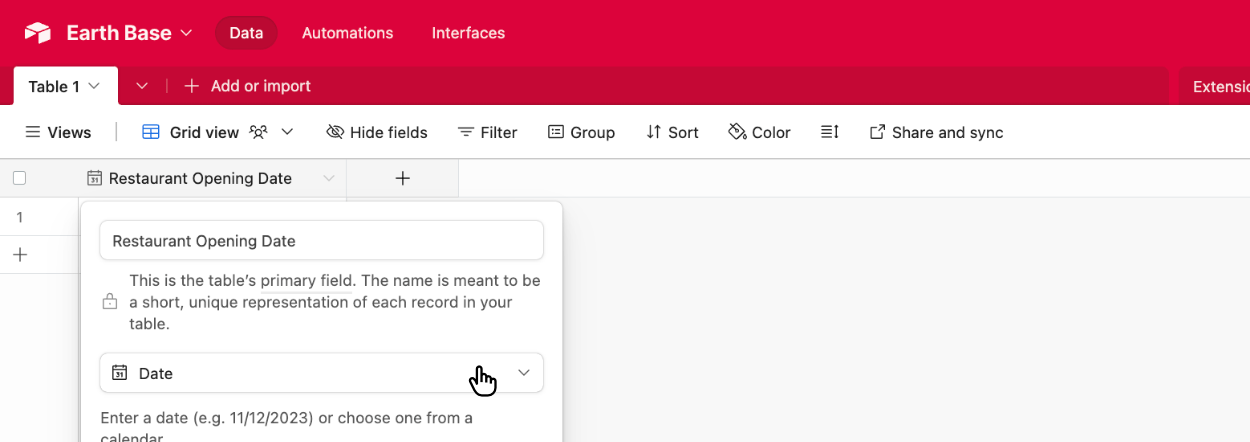
 Field type ‘Date’ • Field Mapped to ‘Restaurant Opening Date’
Then view the new data within Airtable to confirm the connection:

Phone number
Choose the Phone number field type in Airtable to sync telephone numbers:
Then enter some data in the linked field and submit the form:
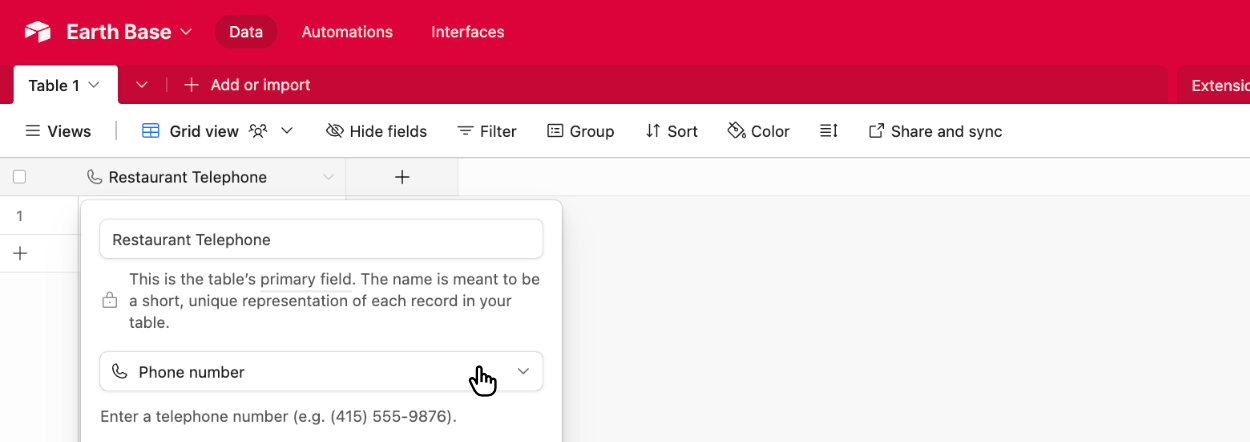
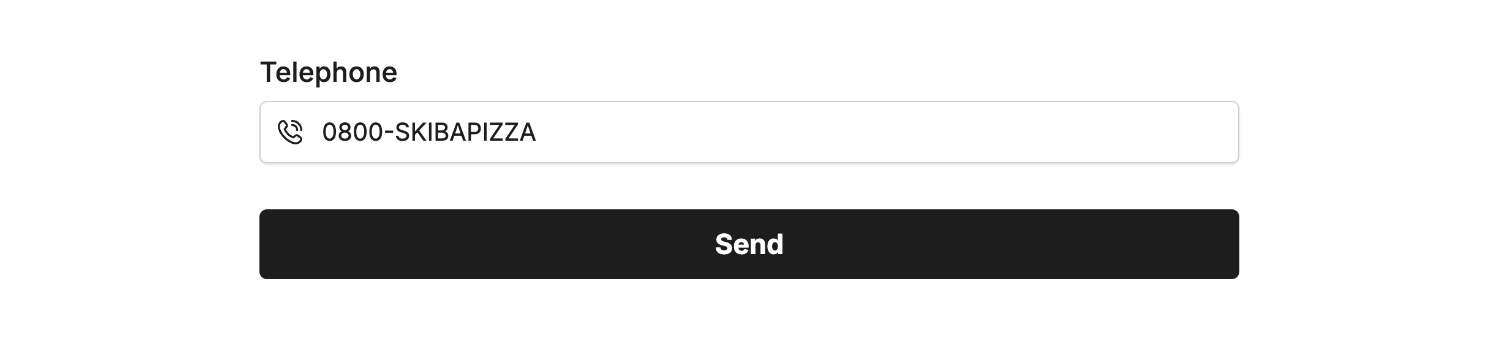 Field type ‘Telephone’ • Field Mapped to ‘Restaurant Telephone’
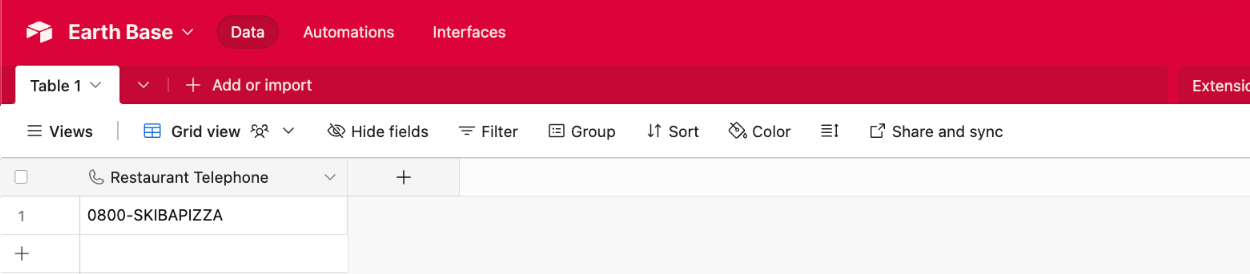
Then view the new data within Airtable to confirm the connection:
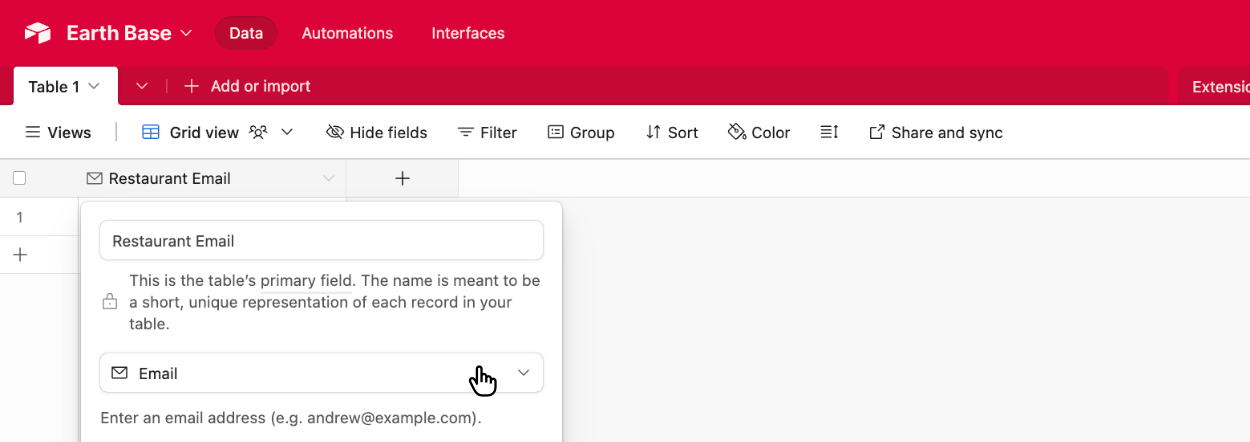
Choose the Email field type in Airtable to sync email addresses:
Then enter some data in the linked field and submit the form:
 Field type ‘Email’ • Field Mapped to ‘Restaurant Email’
Then view the new data within Airtable to confirm the connection:

URL
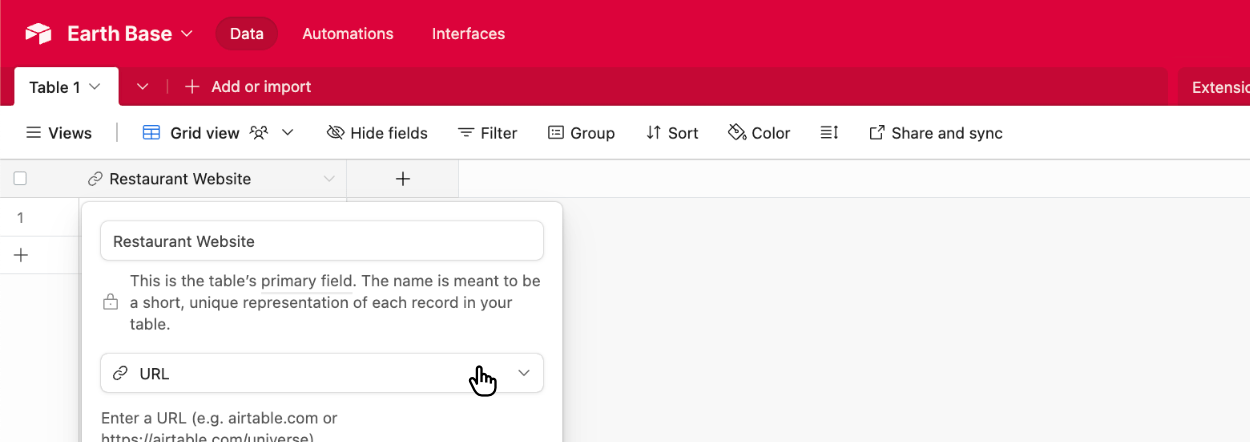
Choose the URL field type in Airtable to sync URL addresses:
Then enter some data in the linked field and submit the form:
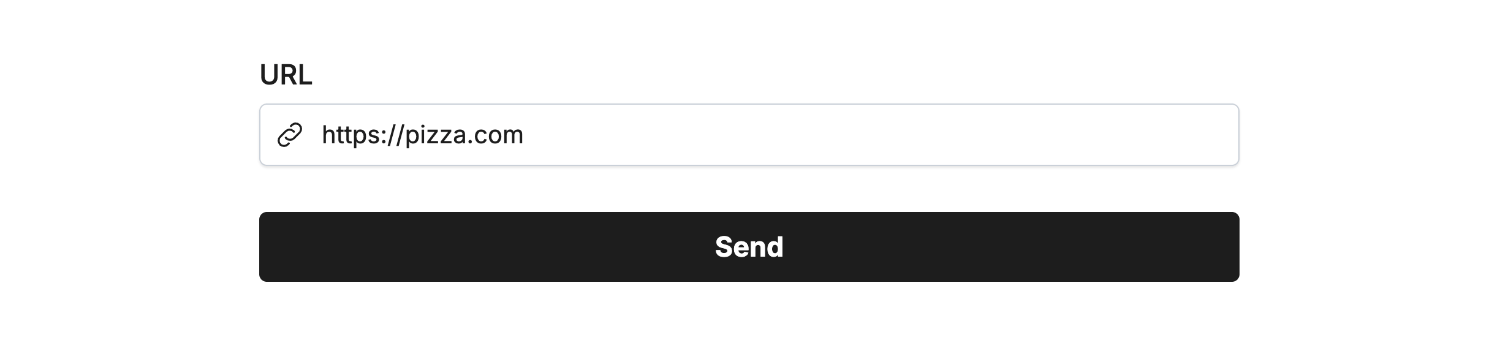 Field type ‘URL’ • Field Mapped to ‘Restaurant Website’
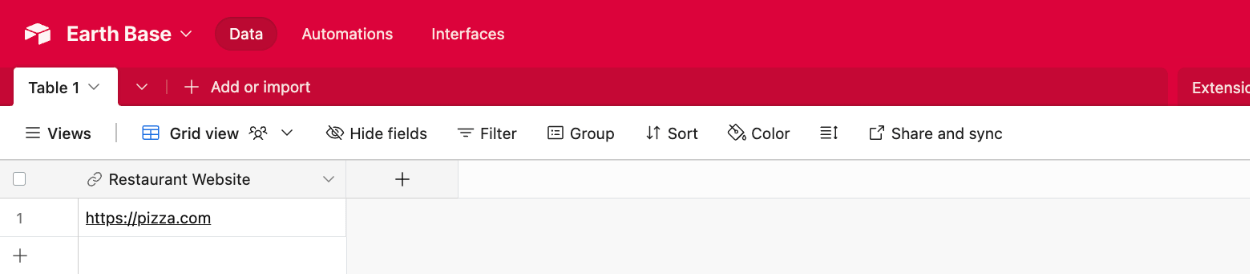
Then view the new data within Airtable to confirm the connection:
Number
Choose the Number field type in Airtable to sync numbers, including decimal places:

Choose the Number Field and enter some data in the linked field and submit the form:
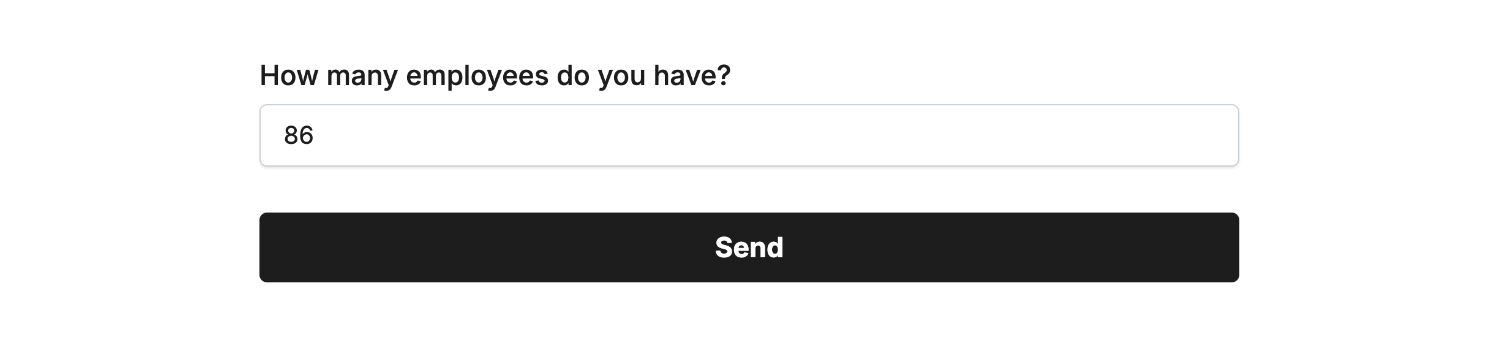 Field type ‘Number’ • Field Mapped to ‘Restaurant Employee Count’
Then view the new data within Airtable to confirm the connection:

Currency
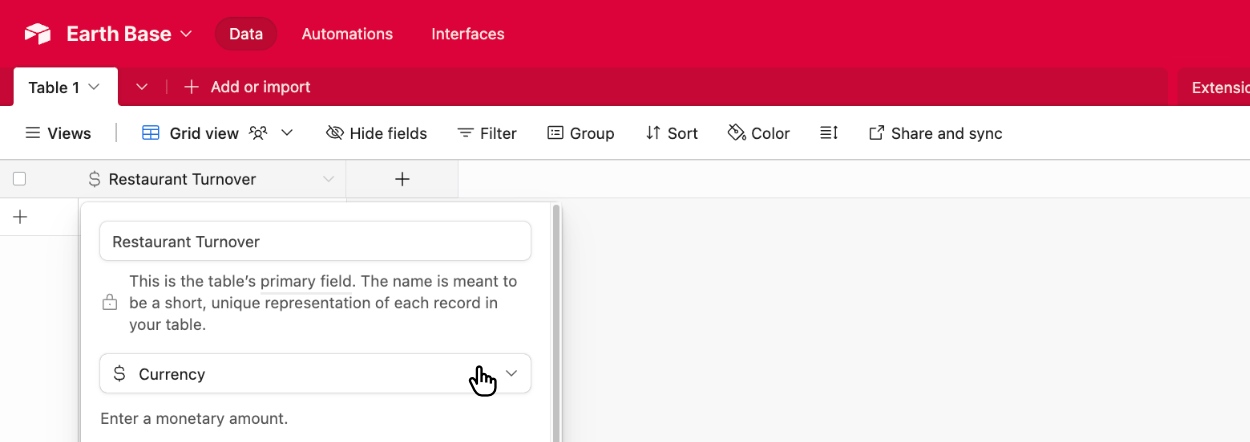
Choose the Currency field type in Airtable to sync numbers related to monetary values, including decimal places:
Choose the Number Field and enter some data in the linked field and submit the form:
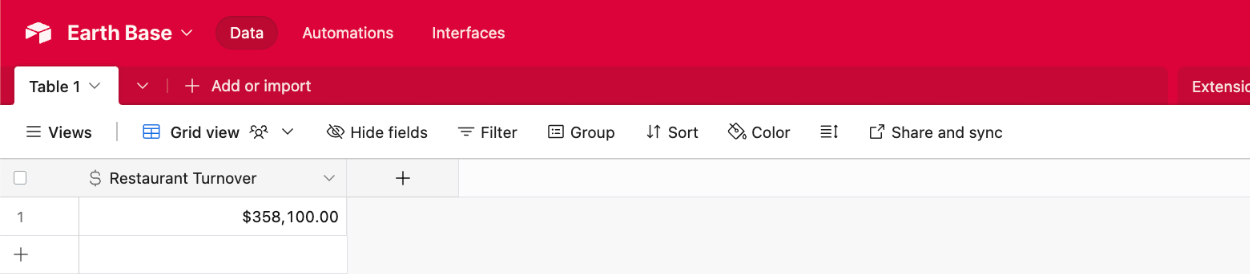
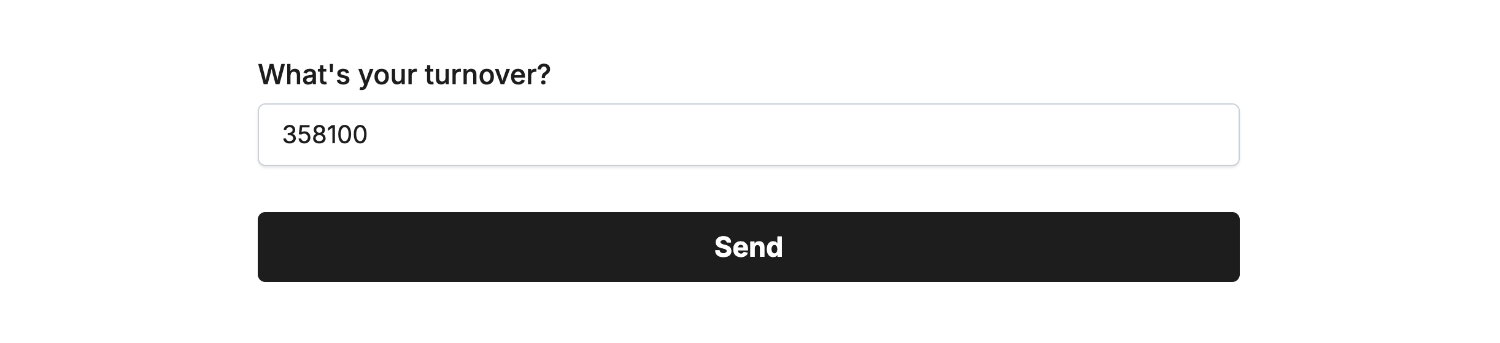 Field type ‘Currency’ • Field Mapped to ‘Restaurant Turnover’
Then view the new data within Airtable to confirm the connection:
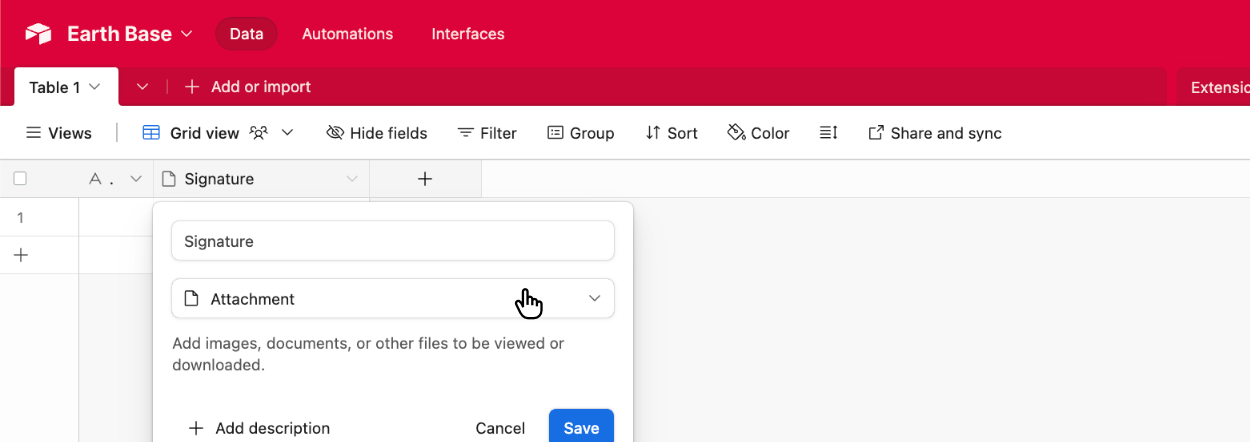
Attachment
Choose the Attachment field type in Airtable to sync the Upload Field and Signature Field as an Airtable row attachment (supports images and documents).
Single or multiple files can be synced to Airtable from each result, however for this guide we’ll demonstrate just using the Signature Field as the process is identical.
Then enter a signature in the linked field and submit the form:
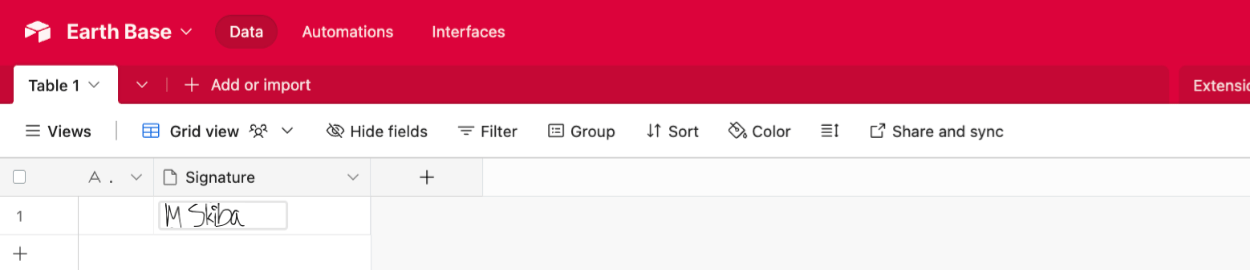
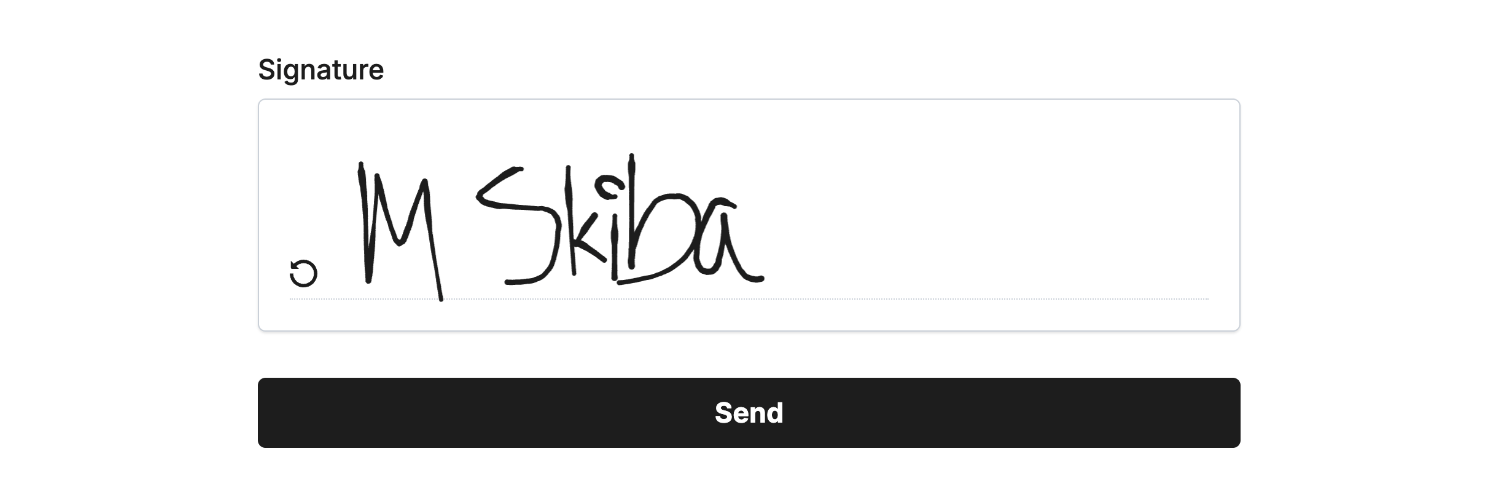 Field type ‘Attachment’ • Field Mapped to ‘Signature’
Then view the new data within Airtable to confirm the connection:
Single select
Choose the Single select field type in Airtable to sync a single predefined value from our Single-Select Field or Dropdown Field.
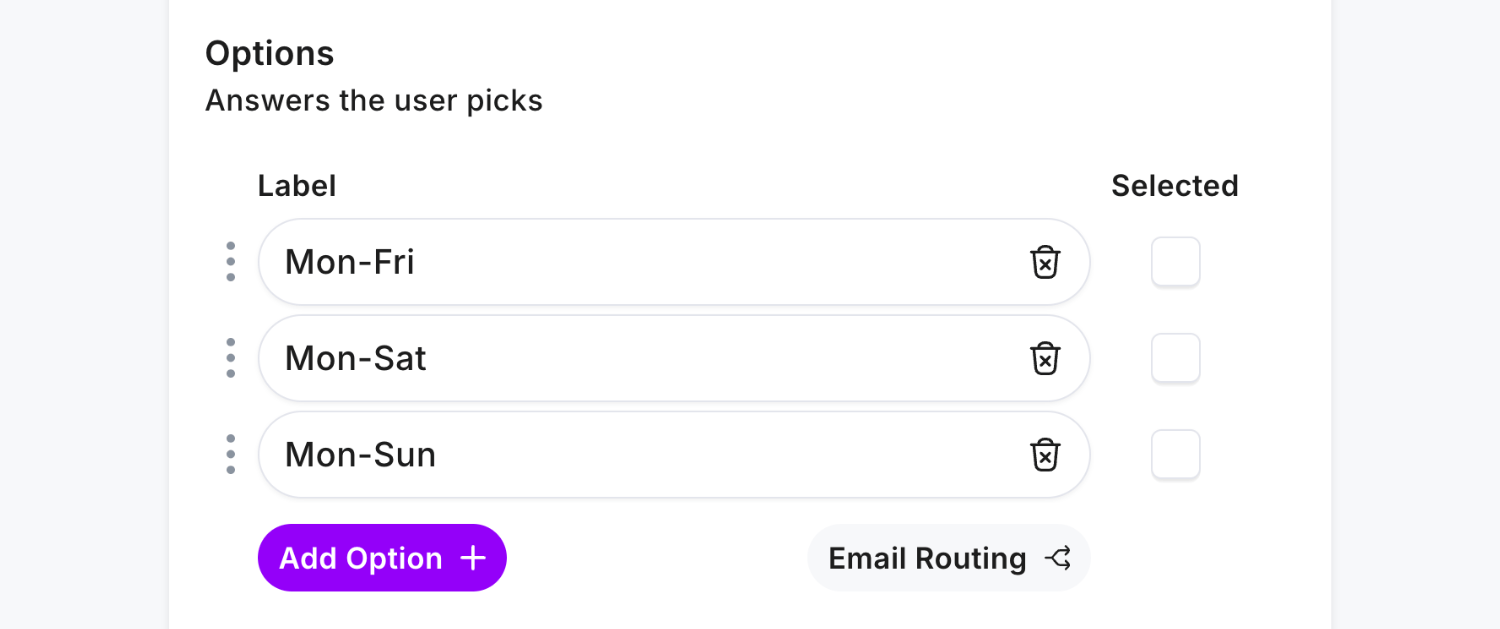
Then enter the list of potential options in the Airtable field:

Head back to your form within Fun Forms and create the identical options, case sensitive:
Then select an option in the linked field and submit the form:
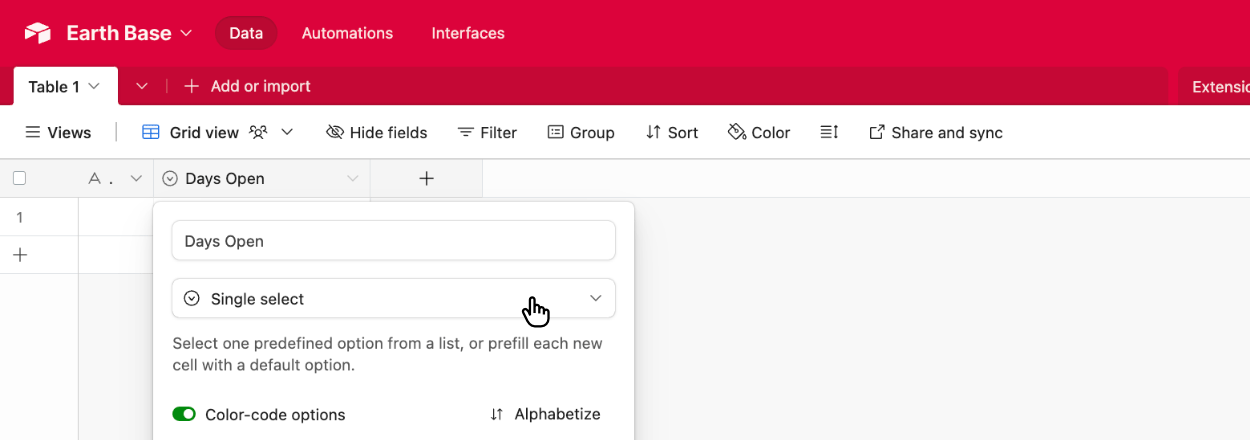
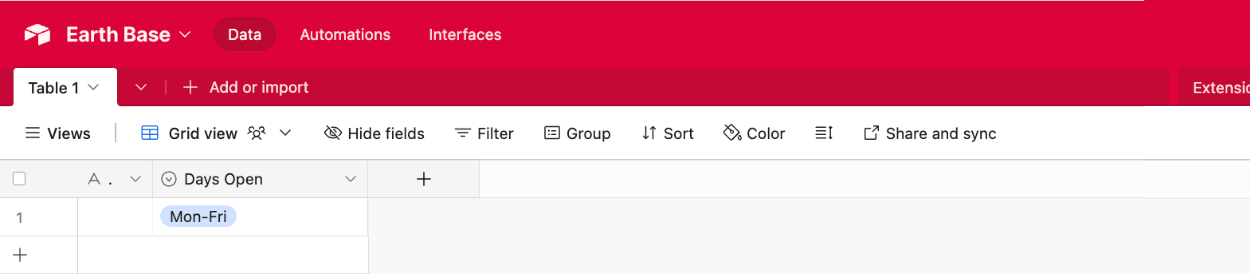
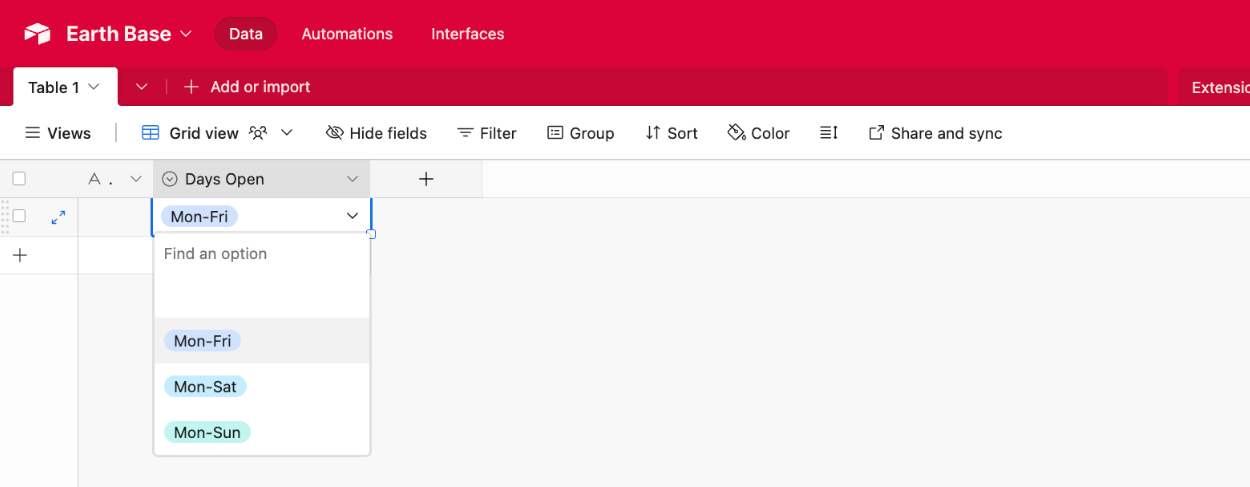
 Field type ‘Single-Select’ • Field Mapped to ‘Days Open’
Then view the new data within Airtable to confirm the connection:
Using Airtable’s ‘Single select’ field allows you to then change the option to another predefined value should you wish:
Multiple select
Choose the Multiple select field type in Airtable to sync a single, or multiple, predefined value from our Multi-Select Field.

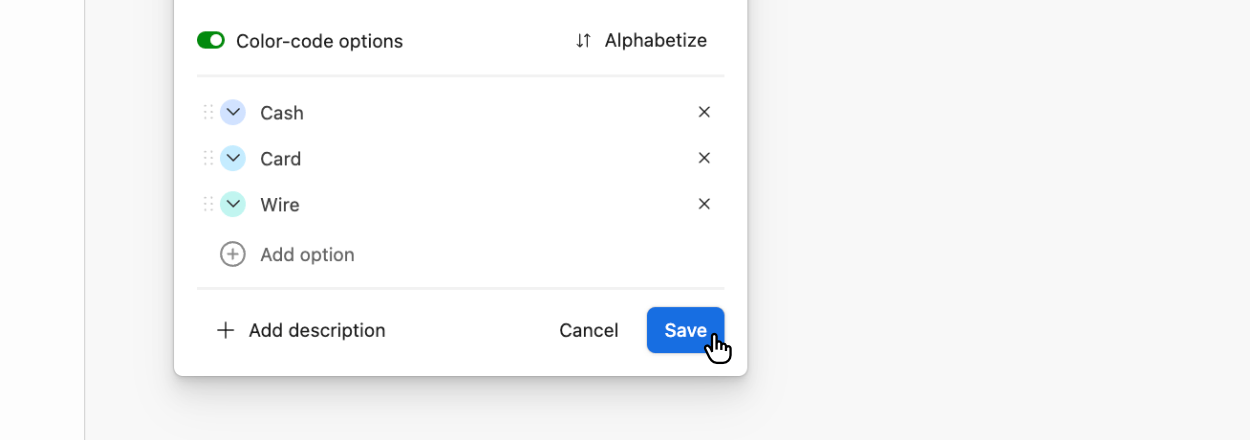
Then enter the list of potential options in the Airtable field:
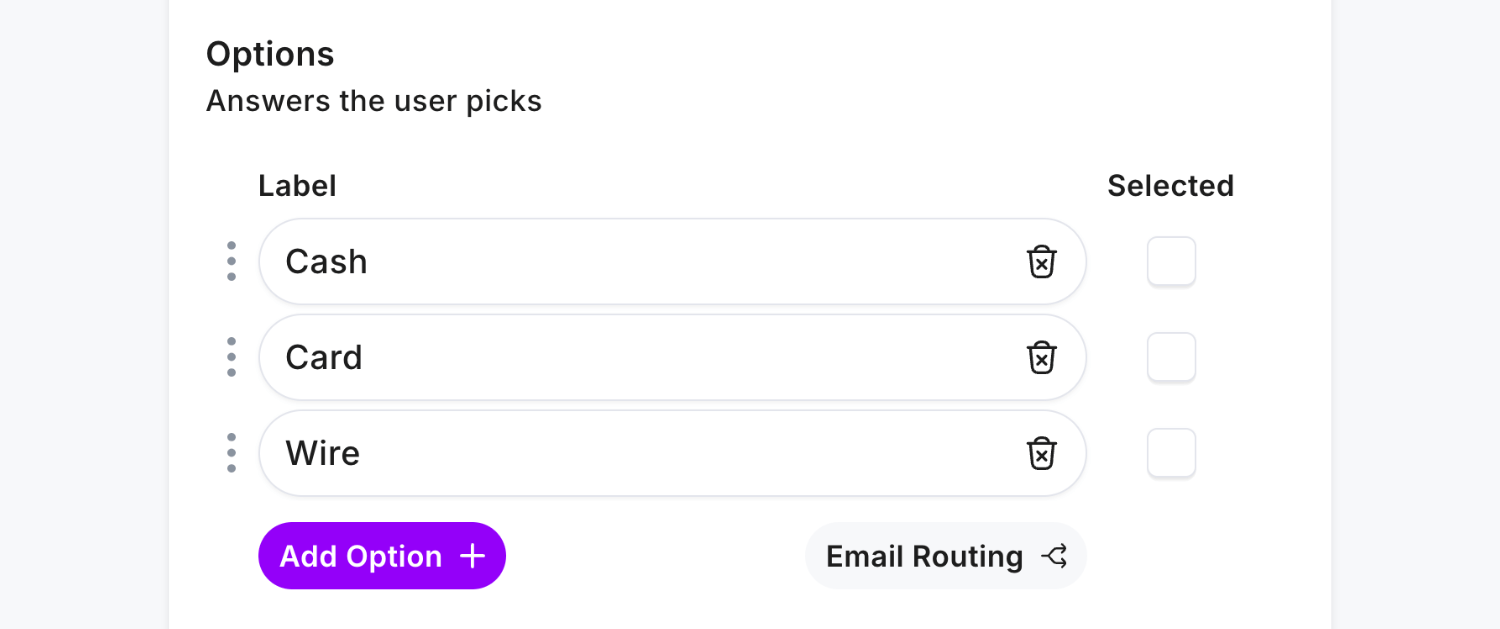
Head back to your form within Fun Forms and create the identical options, case sensitive:
Then select an option or two in the linked field and submit the form:
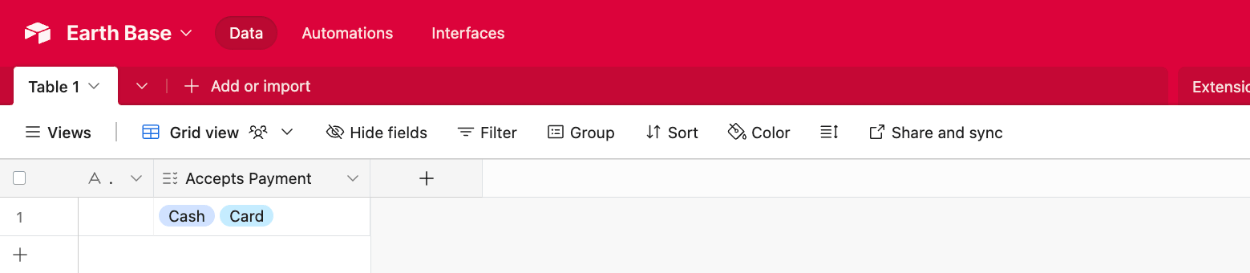
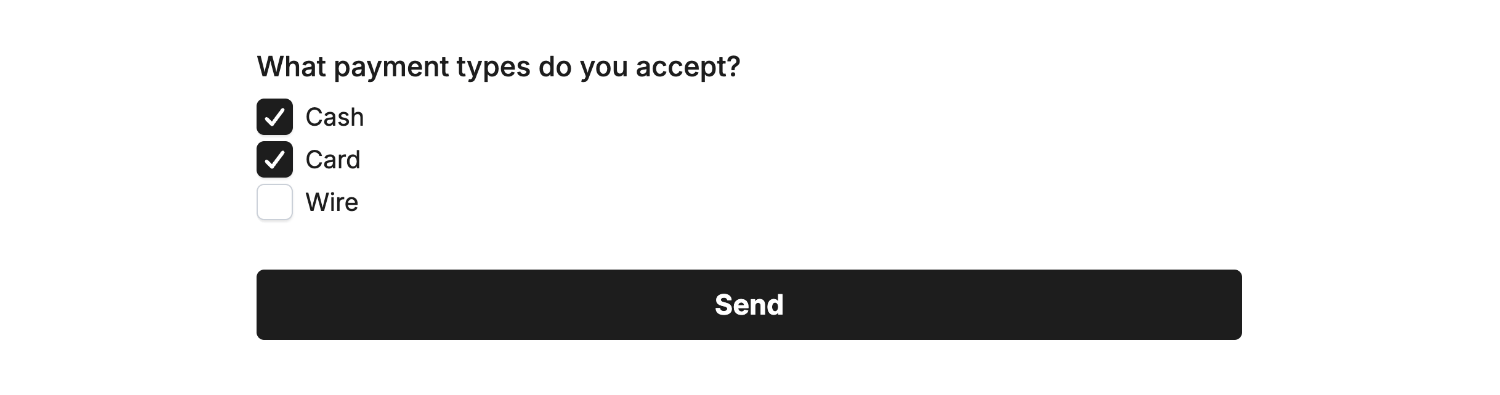 Field type ‘Multiple-Select’ • Field Mapped to ‘Accepts Payment’
Then view the new data within Airtable to confirm the connection:
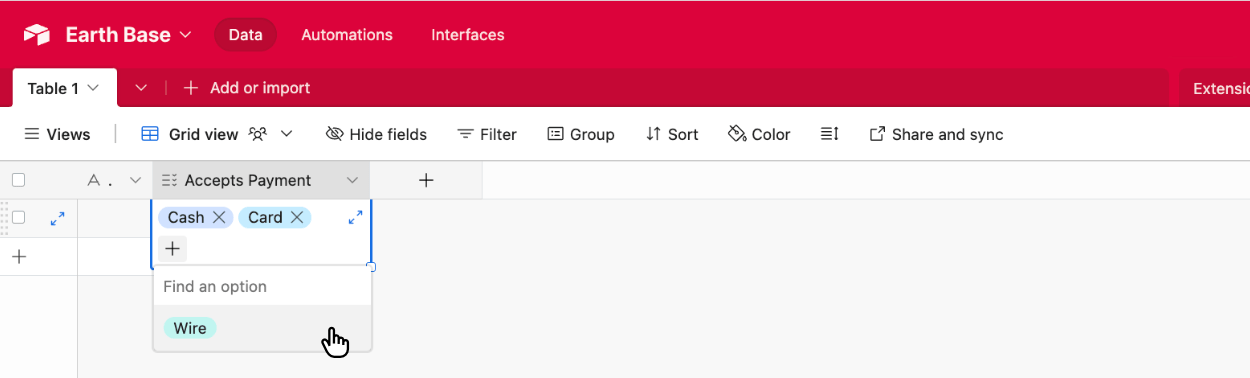
Using Airtable’s ‘Multiple select’ field allows you to then change the option to another predefined value should you wish:
Checkbox
Choose the Checkbox field type in Airtable to sync a status, useful for marking things ‘done’ or ‘checked’. Supported fields we offer direct compatibility for are the Yes/No Field and Multi-Select Field (when used with a single option).
Our recommended field is the Yes/No Field, where users can select a simple Yes or No choice to mark the Airtable checkbox as ticked/unticked, and submit the form:
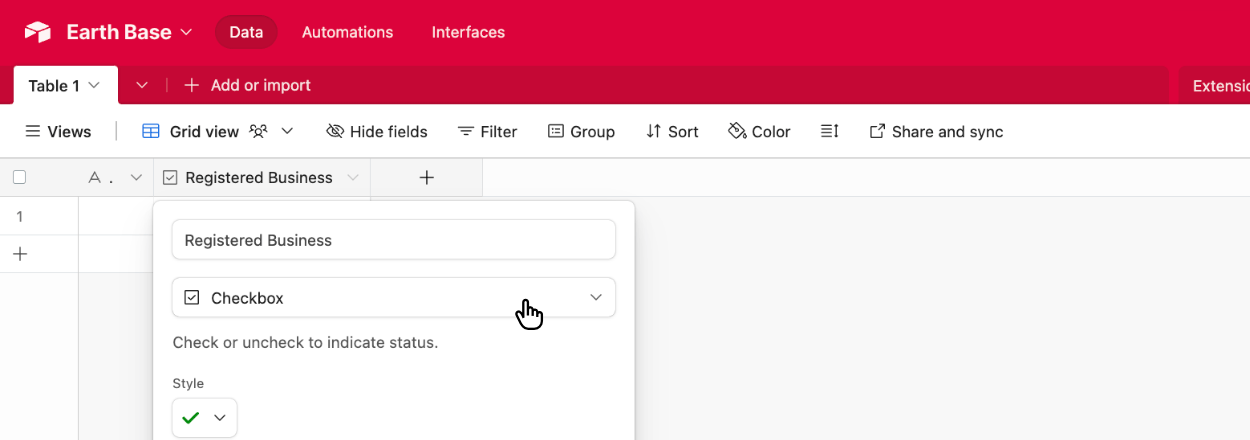
 Field type ‘Yes/No’ • Field Mapped to ‘Registered Business’
Important: The value “Yes” needs to remain for this to work, so don’t rename the label within this field. This is due to us understanding the context as labels can be misleadingly named.
Then view the new data within Airtable to confirm the connection:

The Multi-Select Field may also be used if desired, however must only include one option:

Explainer: Only one option is allowed when using the Multi-Select Field due to the flexibility of the field and associating a selected item with what you intend to be a ‘Yes’ vote to mark the Airtable checkbox as ’ticked’. If two or more Multi-Select options are used, the field will be ignored by the Airtable Plugin.
Then view the new data within Airtable to confirm the connection:

Percentage
Choose the Percentage field type in Airtable to sync a number as a percentage:
Choose the Number Field and have full flexibility on how users enter their percentage.
🏆 Pro Tip: Our Airtable Plugin automatically supports both whole numbers to percentage conversion, or decimals as percentages - so your end users can input either format.
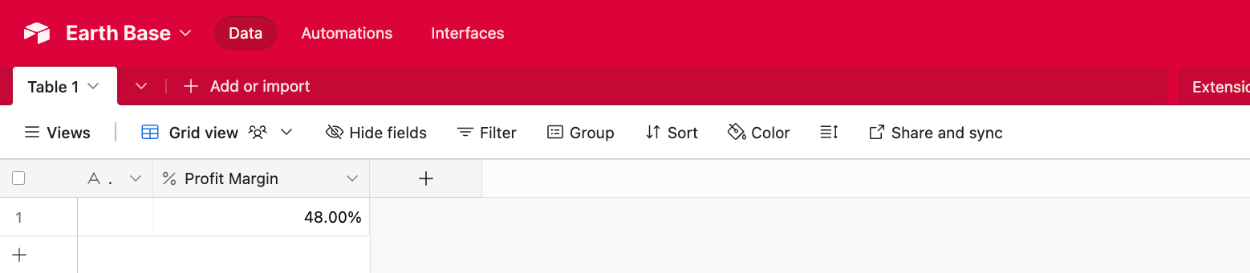
Option 1: Whole Number Entering 48 for 48%:
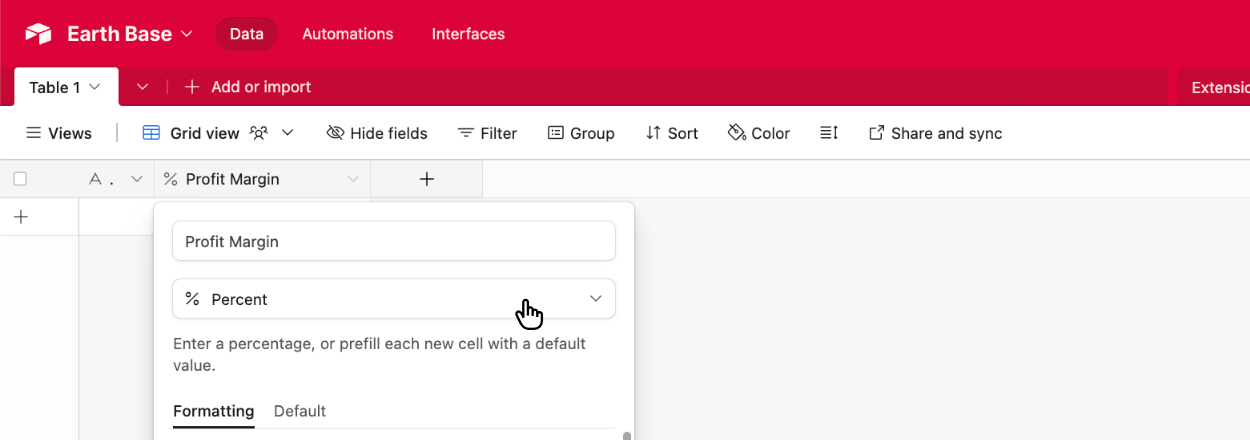
 Field type ‘Number’ • Field Mapped to ‘Profit Margin’
Then view the new data within Airtable to confirm the connection:
Option 2: Decimal Number Entering 0.38 for 38%:
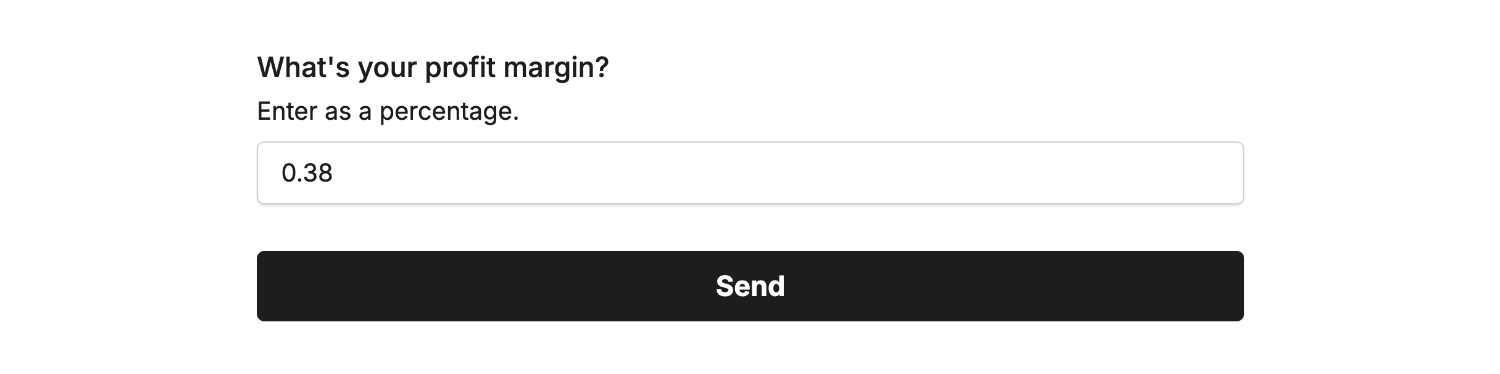 Field type ‘Number’ • Field Mapped to ‘Profit Margin’
Then view the new data within Airtable to confirm the connection:

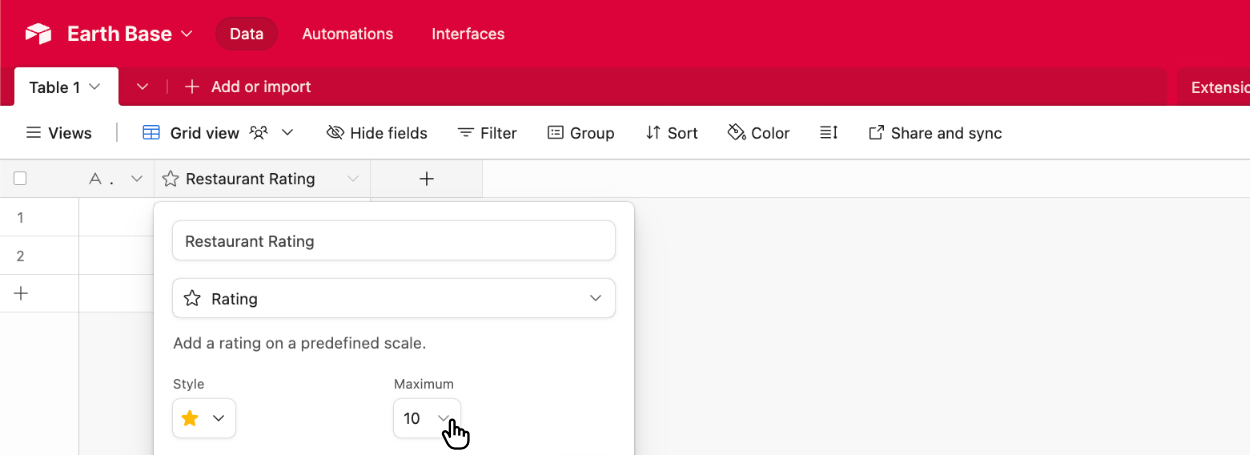
Rating
Choose the Rating field type in Airtable to sync a number as a Rating:
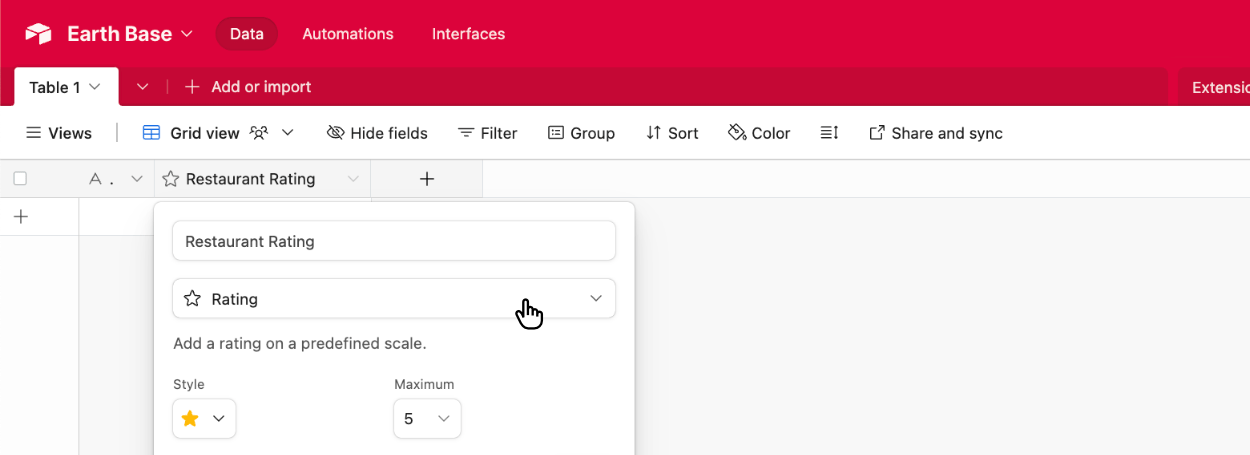
Choose the Rating Field and have seamless integration with Airtable’s rating field.
🚨 Important: Our Airtable Plugin supports either
5or10stars when sending to Airtable, but our form field supports a maximum of5stars. If you choose10stars in Airtable, we double the result for you automatically. ‘Half star’ ratings are supported when using a maximum of10stars within Airtable (as4.5stars can be doubled to9) however half stars are not supported when using5stars within Airtable - as Airtable does not support ‘half stars’, so you need to disable it.
To use 5 stars in Airtable you’ll need to disable half stars for your form field. To do this, click “Edit” on the form field and select ‘Yes’ to the Disable half stars? option:

If your Airtable ‘rating’ field is set to 10 stars, you can keep the half star functionality within your form.
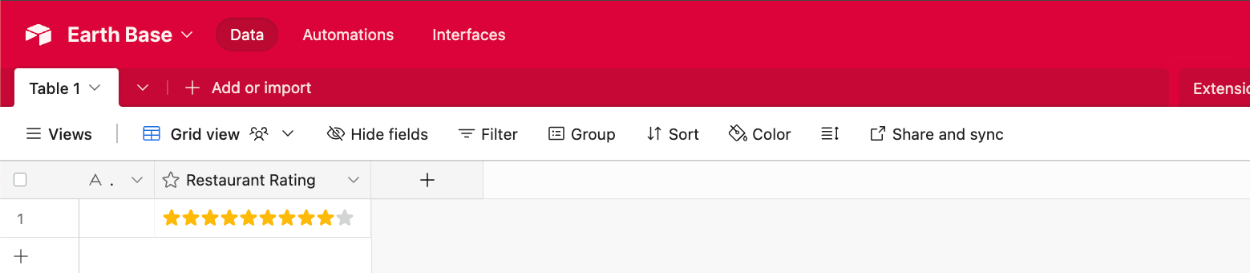
Then select a rating in the linked field and submit the form:
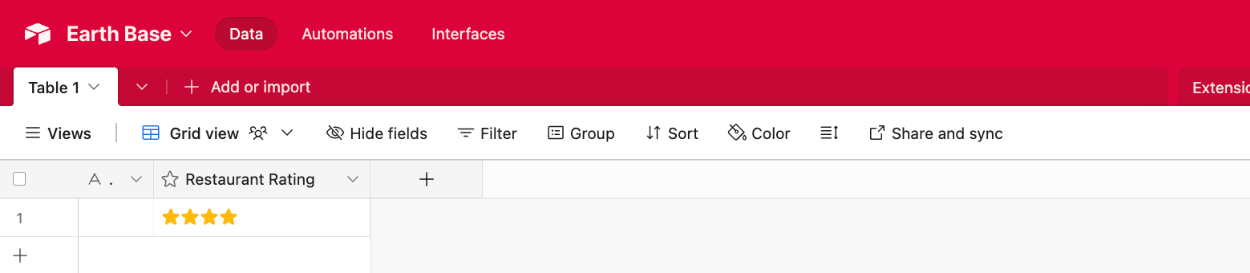
 Field type ‘Rating’ • Field Mapped to ‘Restaurant Rating’
Then view the new data within Airtable to confirm the connection:
If you’d like to use the half-star form feature, then enable 10 stars within the Airtable field:
Then enable half star ratings in the form field by clicking “Edit” on the form field and selecting ‘No’ to the Disable half stars? option:

Then select a half-star rating in the linked field and submit the form:
 Field type ‘Rating’ • Field Mapped to ‘Restaurant Rating’
You’ll then see 4.5 doubled to 9 to give you half-star rating support alongside 10 maximum stars within Airtable:
That’s it! You can contact us for help anytime.