Hubspot Plugin
ProTransform Form Responses into Hubspot Contacts.
Use the Hubspot Plugin to create new contacts from form results, complete with Lead Status and Lifecycle Stage.
Setup the Plugin
Go to the Plugins page in your form, select Hubspot and click Connect to Hubspot:

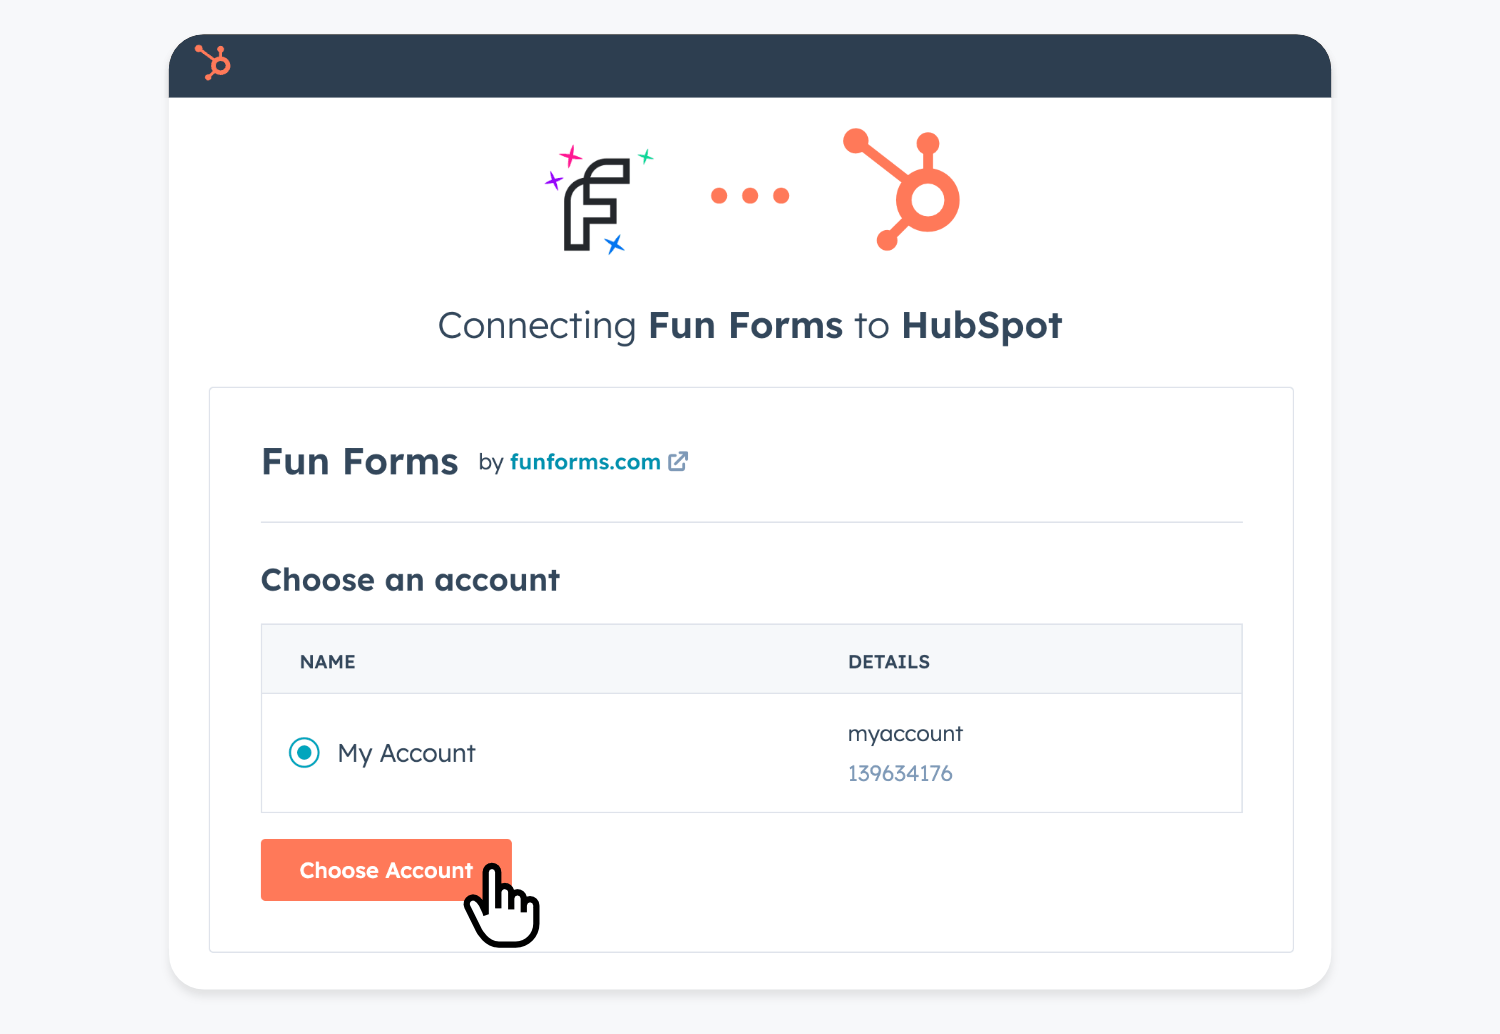
Click Choose Account once the authorization window has launched and you’ve logged in:
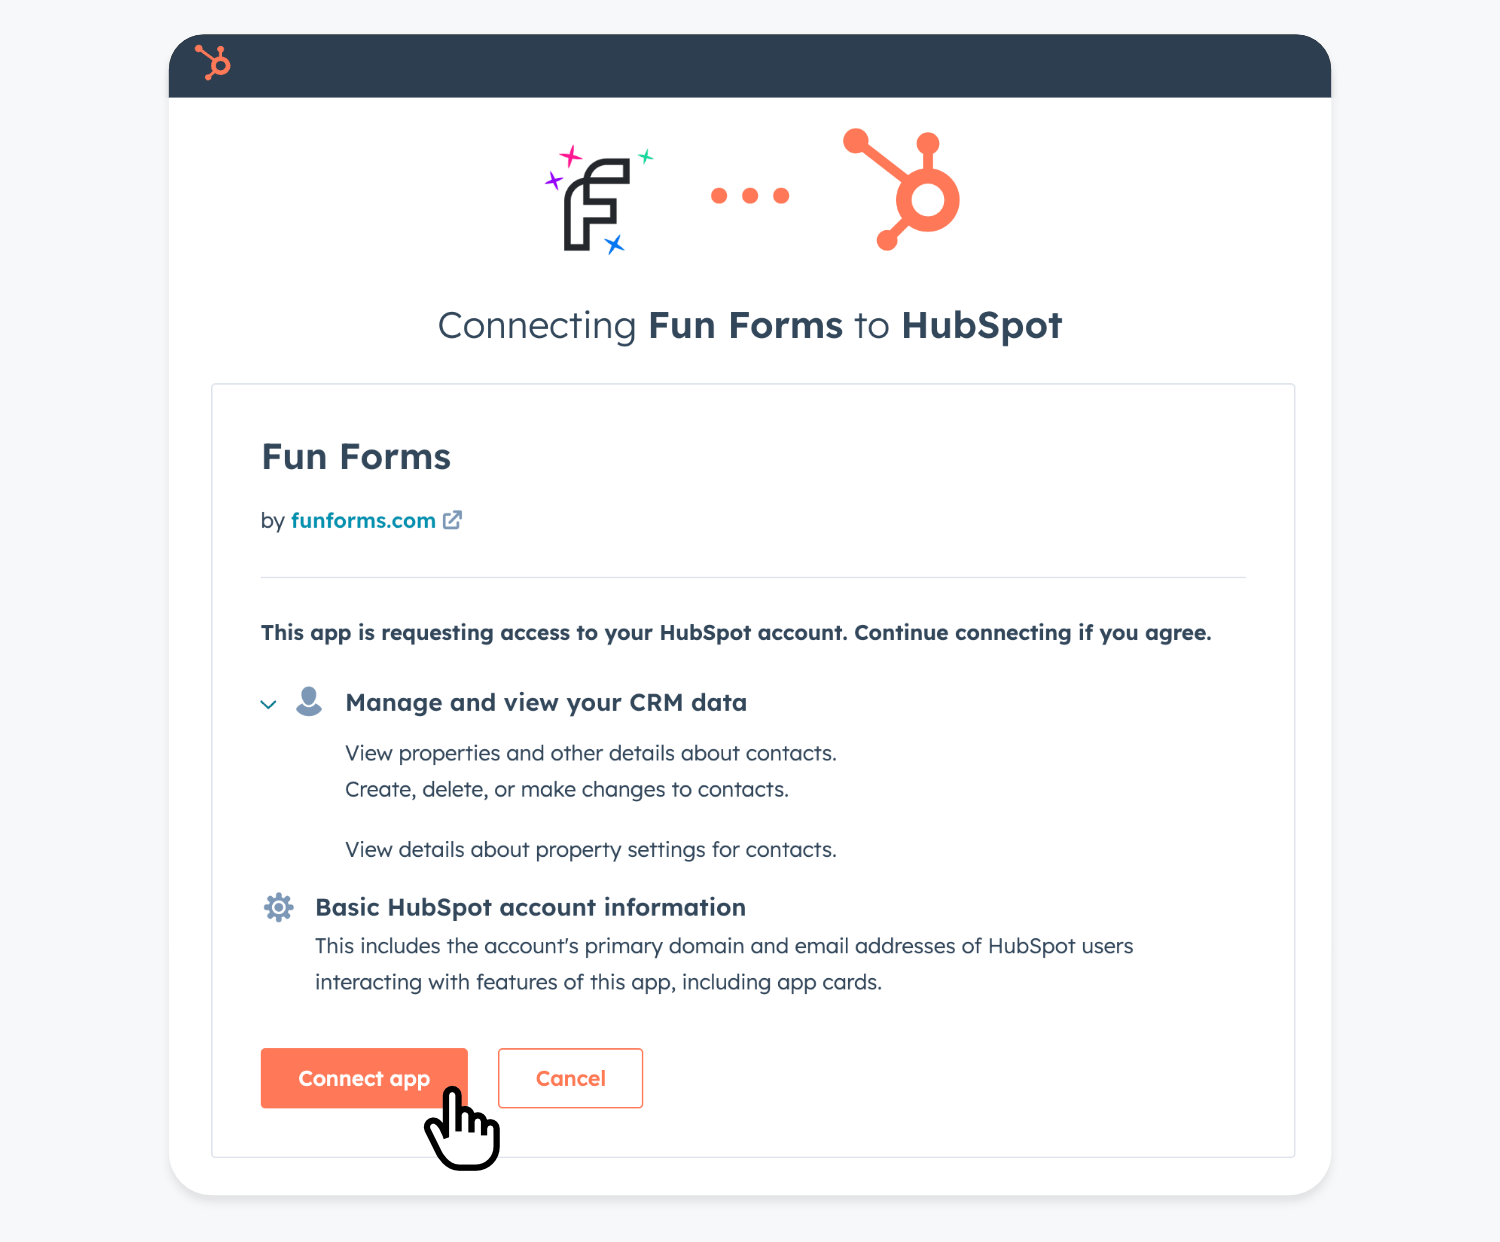
Then, click Connect app to complete the process:
Once authorized, select a Lead Status and optionally a Lifecycle Stage to associate with each new contact:
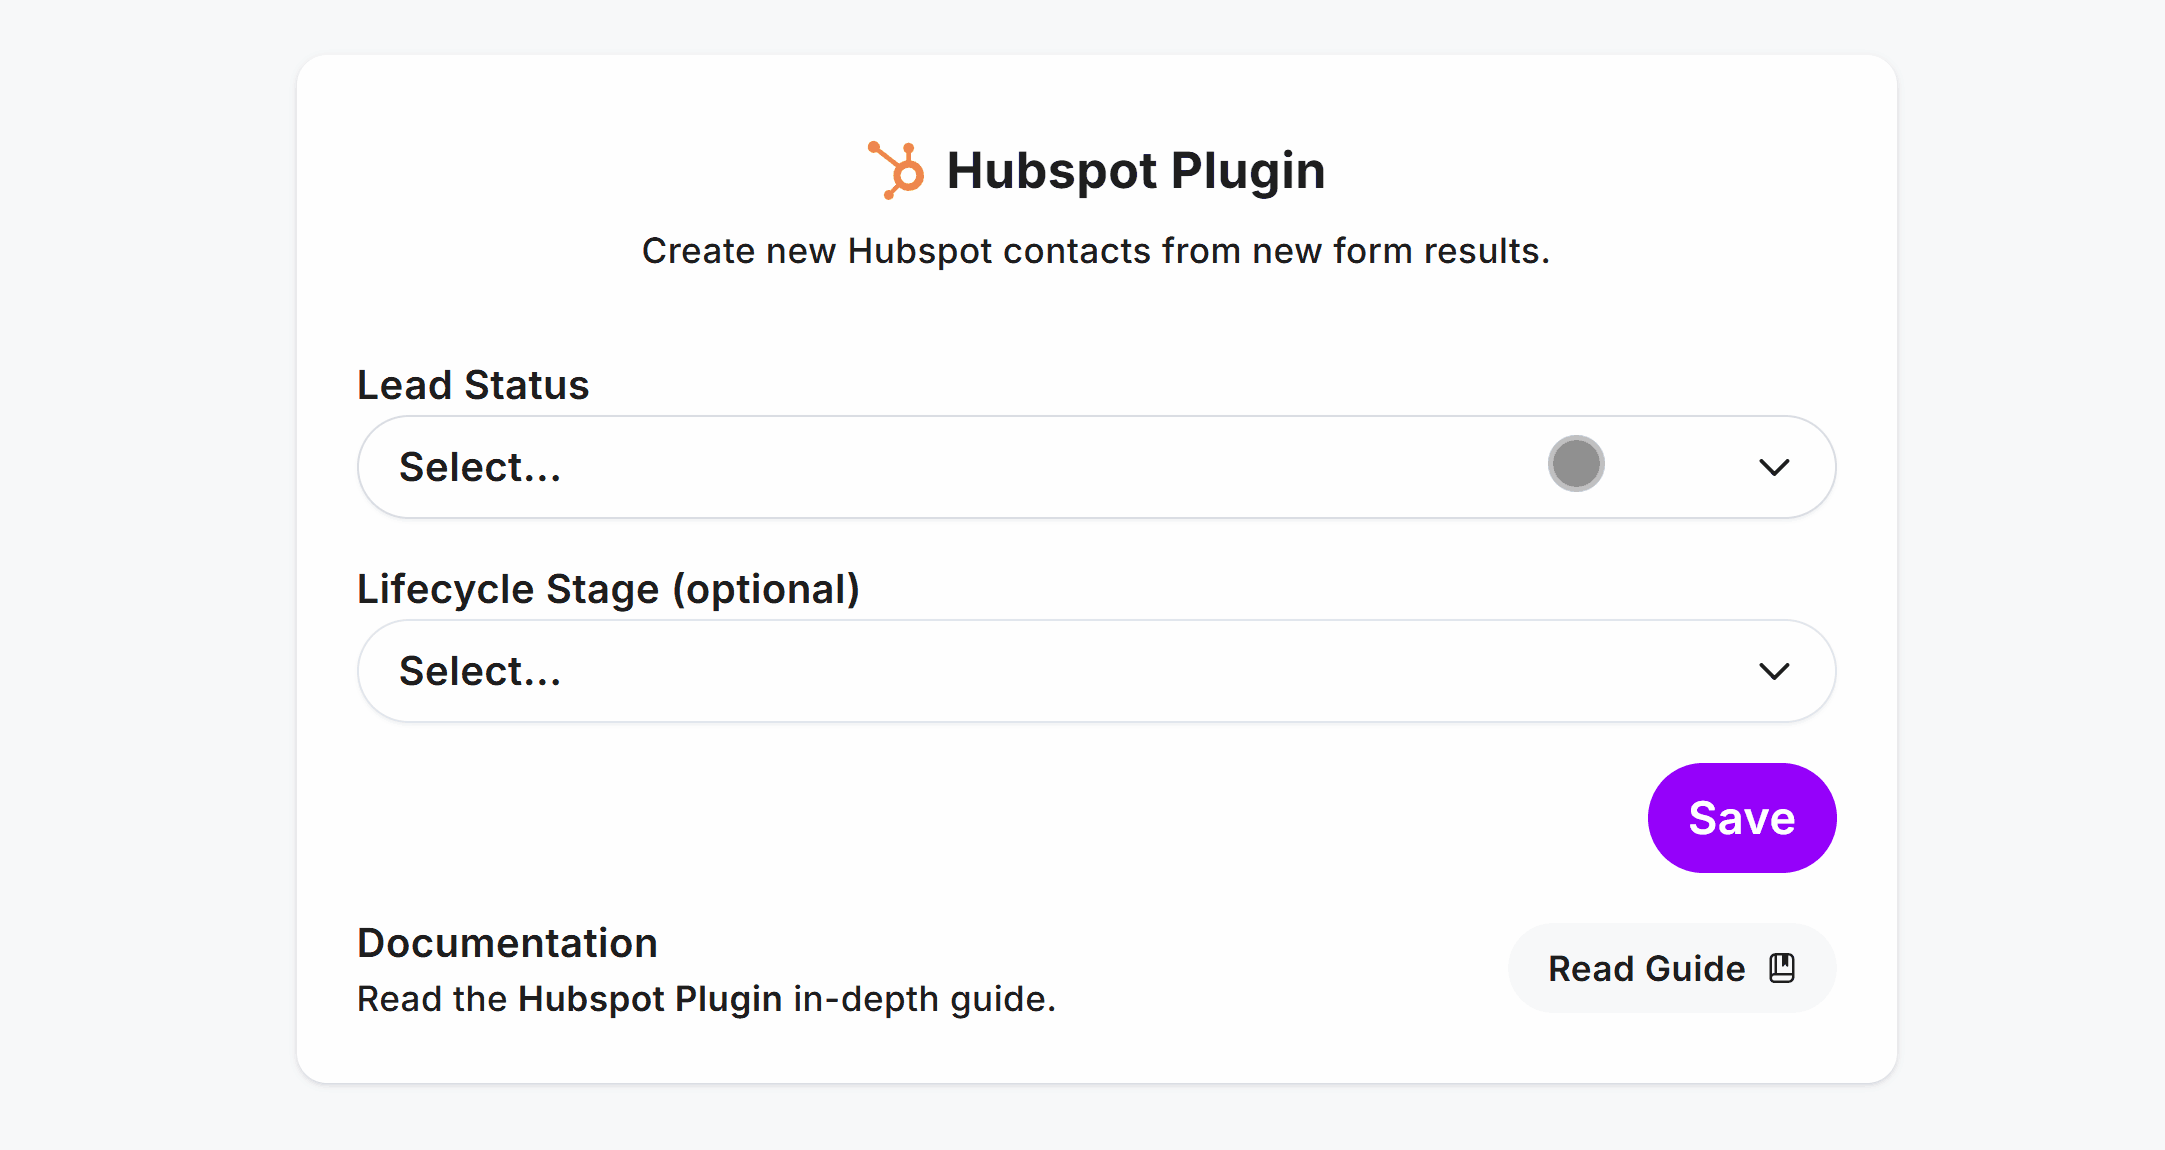
Once setup, you’ll see your chosen Lead Status and Lifecycle Stage.
🔗 Learn more about Hubspot Lead Status and Lifecycle Stages.
Customization
Sync Contacts with Hubspot
To create new Hubspot contacts from form results, use the Field Mapper within the Hubspot Plugin to connect form fields to Hubspot property names.
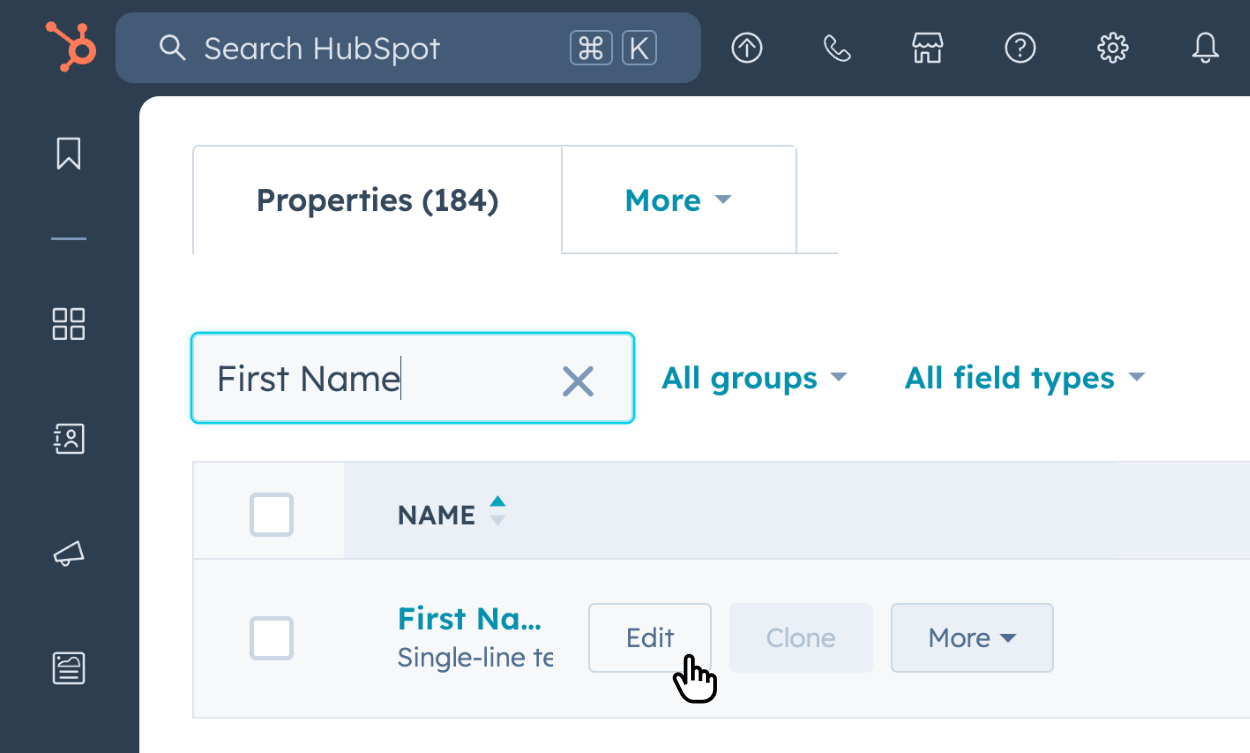
To find the relevant Hubspot property names, click on Contacts inside Hubspot and then click the Actions button to select Edit properties:

Find a property by scrolling, or type to filter the property results. Once you’ve found a property you need, click Edit:
You’ll then see a popup where clicking the </> icon shows the Internal name, go and copy it:

In our example the First Name property has an Internal name of firstname. This unique identifier is what we need to connect a form field with the Hubspot First Name field for each contact.
🔗 Here’s a list of all Hubspot’s default contact properties for easy access.
Before we use the Field Mapper to connect form fields to Hubspot, here’s a list of commonly used Internal names for you:
email- required for a new contact’s emailfirstname- contact’s first namelastname- contact’s last namesalutation- contact’s salutationcompany- contact’s company nameindustry- contact’s industry sectorjobtitle- contact’s job titlephone- contact’s phone numbermobilephone- contact’s mobile phone numberaddress- contact’s street addresscity- contact’s citystate- contact’s state/regionzip- contact’s zip/postal codewebsite- contact’s website URL
To associate any of these Internal names with a form field, visit the Hubspot Plugin page and select a field and enter the Internal name to create the connection.
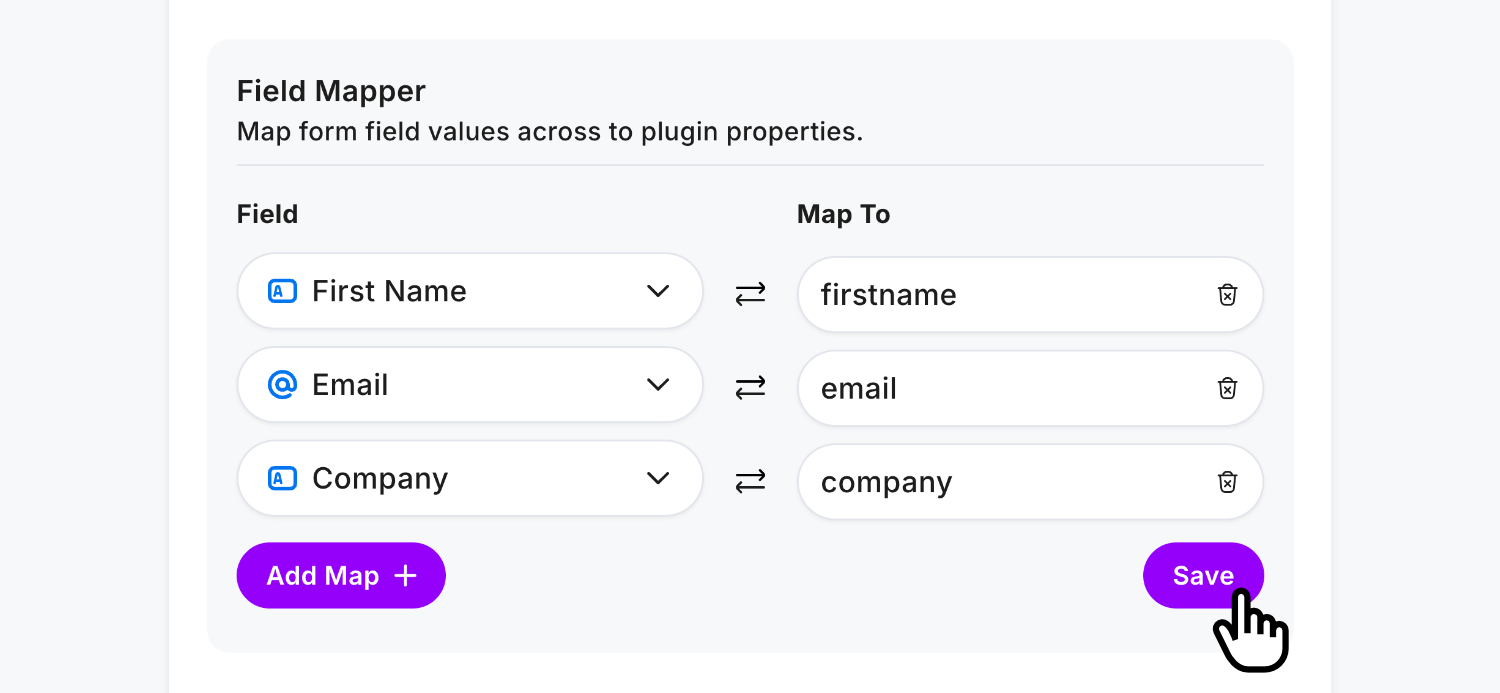
Once these fields are filled in by a user, the values will be mapped to the Hubspot property names when creating each contact.
Merging Lead Status and Lifecycle Stages
When a Hubspot Contact is created for the first time, it will contain your configured Lead Status and Lifecycle Stage.
These Hubspot options help you manage each contact in your CRM, and you will be responsible for updating them within your Hubspot account.
This plugin supports updating contacts, which means you need to merge or ignore any existing Lead Status and Lifecycle Stage values if the same user fills out your form again (or perhaps you have another form connected to Hubspot as well).
Example: if you’ve changed a Lead Status inside Hubspot for a contact from “New” to “Open”, and they submit another form response - by default the plugin uses your configured Lead Status and Lifecycle Stage values to update that contact every time. In our scenario, this means that even though you’ve changed the Lead Status from “Open” to “New”, it will set it back to Open if you check the “merge” option.
Leave the merge options alone if you wish to set their Lead Status and Lifecycle Stage only once, and ignore it for any future updates where the contact may fill in your form again.
Pro Tip: The Lifecycle Stage value can only move forward in the lifecycle stages when merged, and cannot be set ‘backwards’ upon updating an existing contact. The Lead Status can be merged and updated to any value.
Plugin Demo
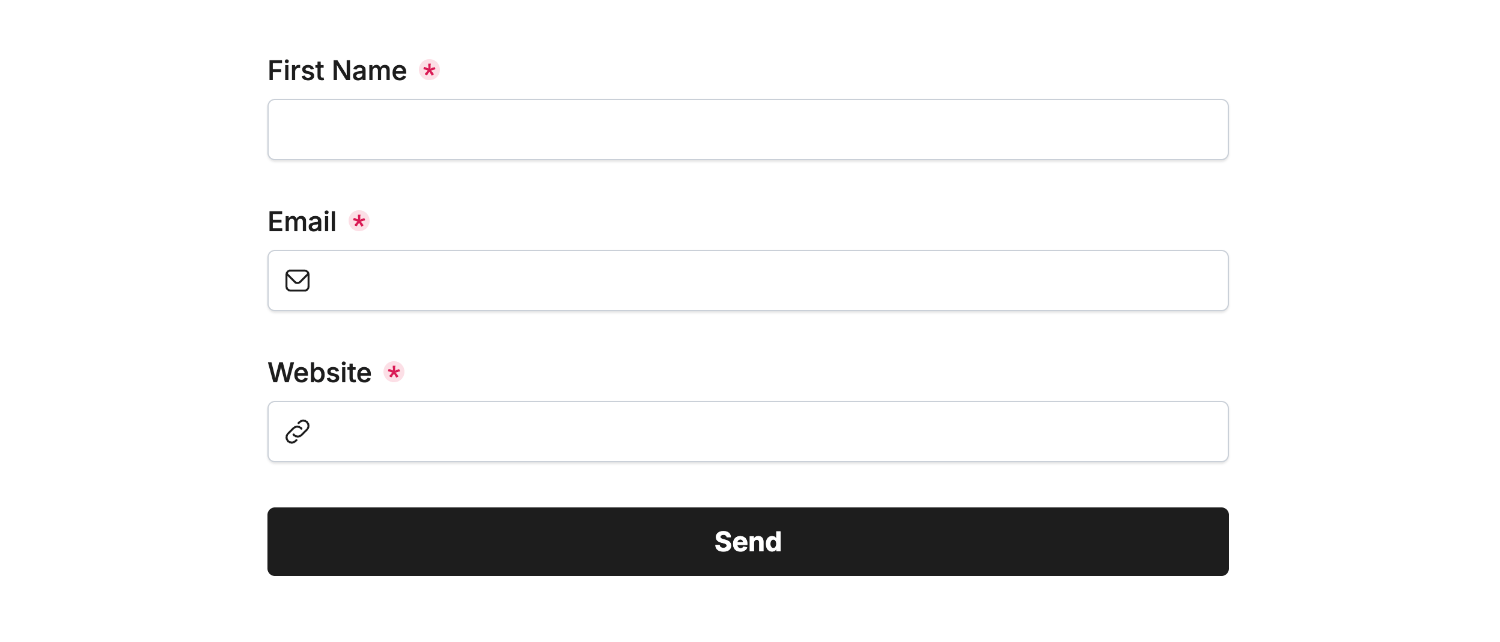
First create a form and add some fields:
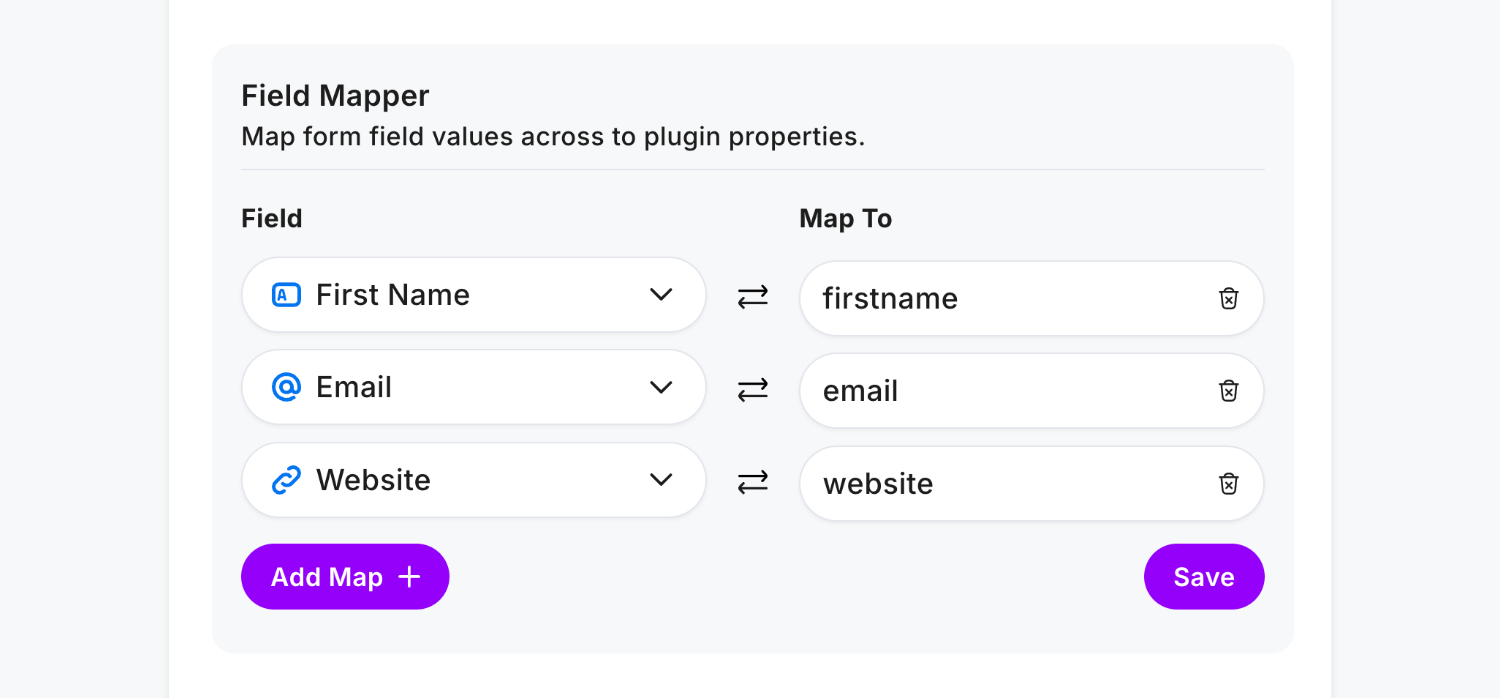
Then create the connection to each field with a Hubspot Internal name with the Field Mapper:
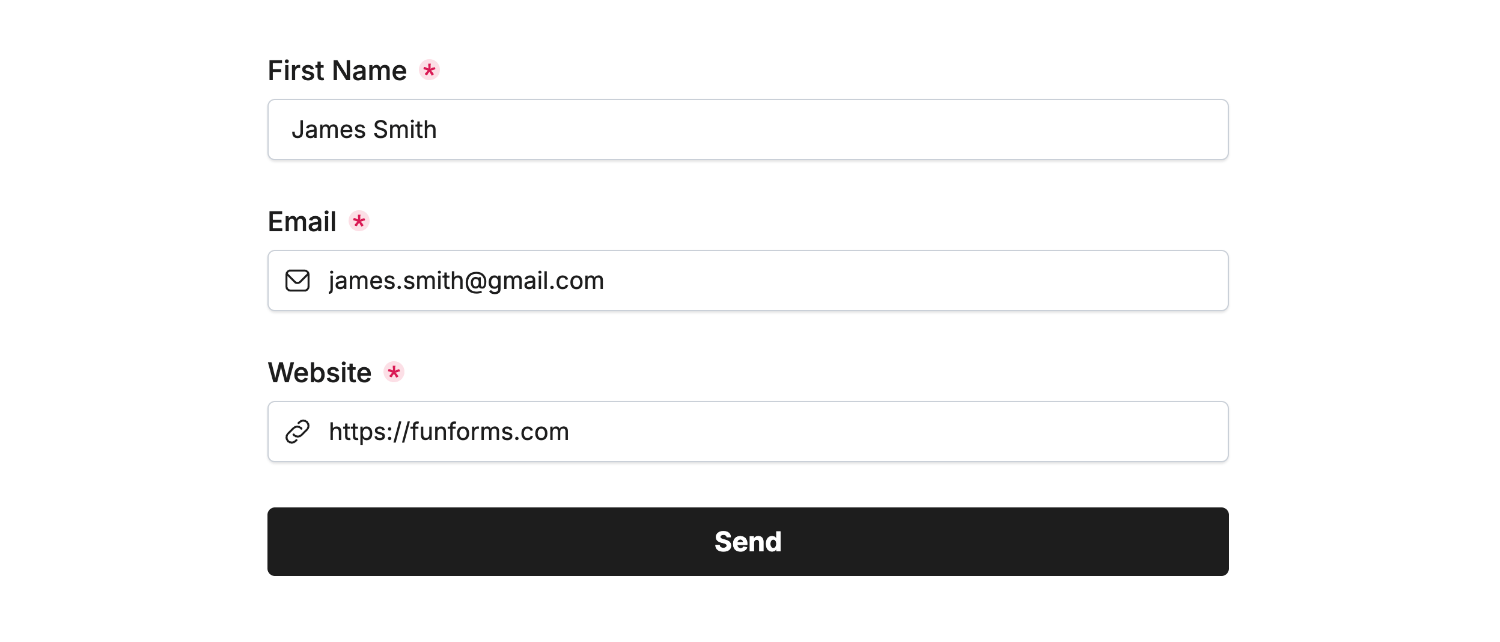
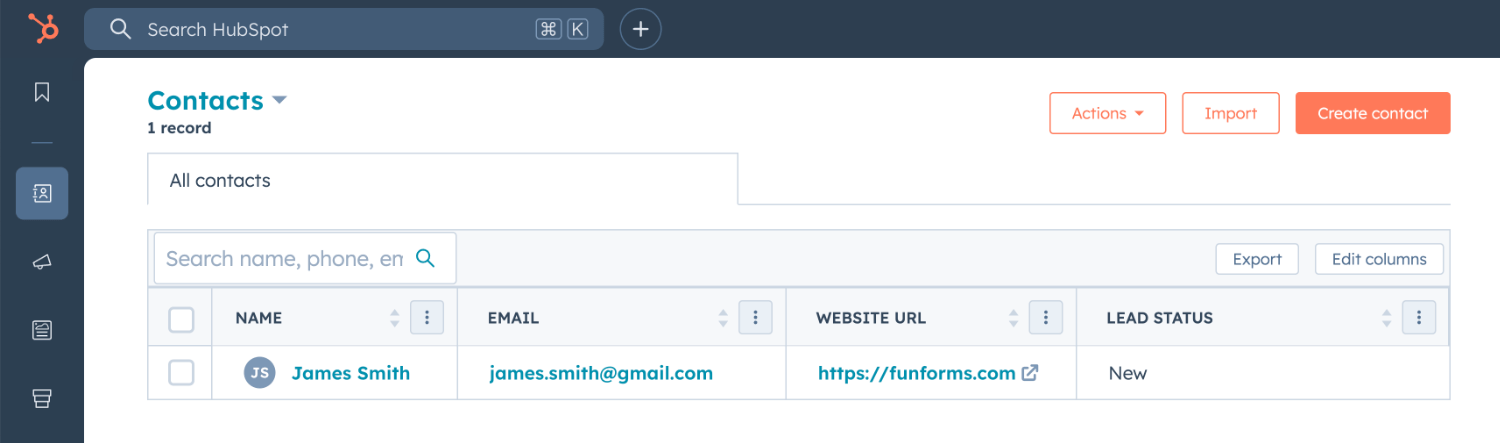
Click Save and Publish, then enter some data in your form and click Send:
Then check inside Hubspot to see your newly created contact with correct mappings:
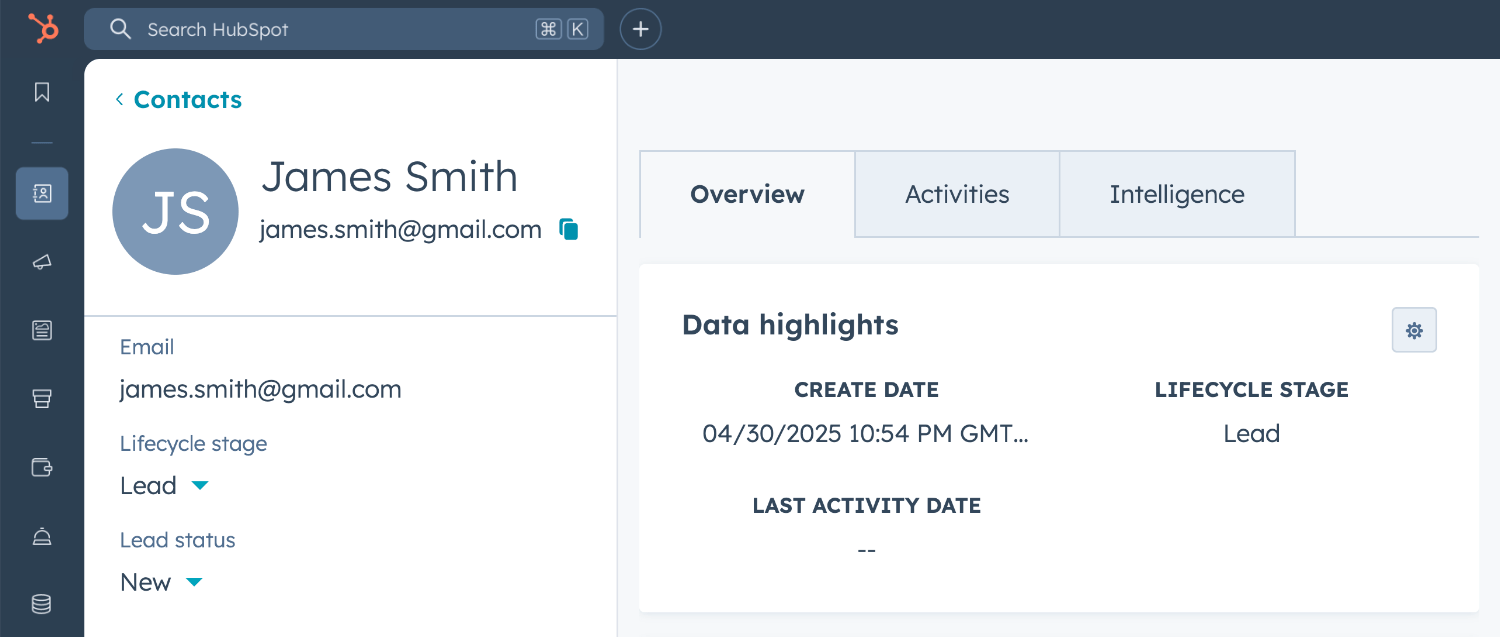
Clicking on the new contact will reveal the optional Lifecycle stage and Lead status:
That’s it! You can contact us for help anytime.